[iOS] DiffableDataSource n-Section n-Item (섹션마다 다른 셀)
DiffableDataSource을 이용하여 각각의 섹션마다 다른 셀을 적용하고자 함.
개발환경
최소지원타겟: iOS 13
Xcode: 14.0
Language: Swift 5
iOS 14이상에서는?
iOS 14이상의 경우 아주 간단하게 처리할 수 있음.
하지만, 취업 시장에서는 13을 기준으로 하고 있어서 이거 기준으로 공부하고자 함.
UICollectionView.CellRegistration
이는 애플의 공식문서에도 나와있음 다만, iOS 14이상에서 가능
공부 과정에서 겪은 실수들 (주의할 점)
실수해서 크래시를 많이 내서 기록하고자 함.
1. 기본적으로 Item의 경우에는 Hashable해야 하고, 중복으로 처리할 경우 문제 발생
결과 이미지의 세번째 사진을 보면 배열에 1이 4개가 들어있음에도 불구하고 1이 하나만 보여짐.
그 이유는 Hashable하기 때문에 Set으로 처리 되어서 같은 값이 경우에는 하나로 인식함.
따라서 모델을 정의하여 사용할 때 uuid 혹은 uniqueKey를 명확하게 하고 Equtable를 명확히 구현해주기.
만약 같은 Unique하지 않게 값이 들어가는 경우라면 콘솔에 아래와 같은 에러는 보여준다.
특히, 아래의 에러가 중복되는 수 만큼 찍혀서 디버그하기가 용이하다.
```
[UIDiffableDataSource] Diffable data source detected an attempt to insert or append 1 item identifier that already exists in the snapshot. The existing item identifier will be moved into place instead, but this operation will be more expensive. For best performance, inserted item identifiers should always be unique. Set a symbolic breakpoint on BUG_IN_CLIENT_OF_DIFFABLE_DATA_SOURCE__IDENTIFIER_ALREADY_EXISTS to catch this in the debugger. Item identifier that already exists: AppleCollectionView.MuseumViewController.Item.number
```
같은 코드를 실행할 때, 이미 해당 item (즉, identifier)이 현재 snapshot 안에 존재하는 상태였다는 의미.
DiffableDataSource는 내부적으로 각 item을 unique identifier로 관리하기 때문에
시스템은 이 상황에서 자동으로 중복 아이템을 이동(move) 처리하지만, 이 방식은 “성능이 떨어지고, 의도치 않은 UI 갱신”을 초래할 수 있음.
2. DataSource 후 snapshot 호출
순서에 유의하기
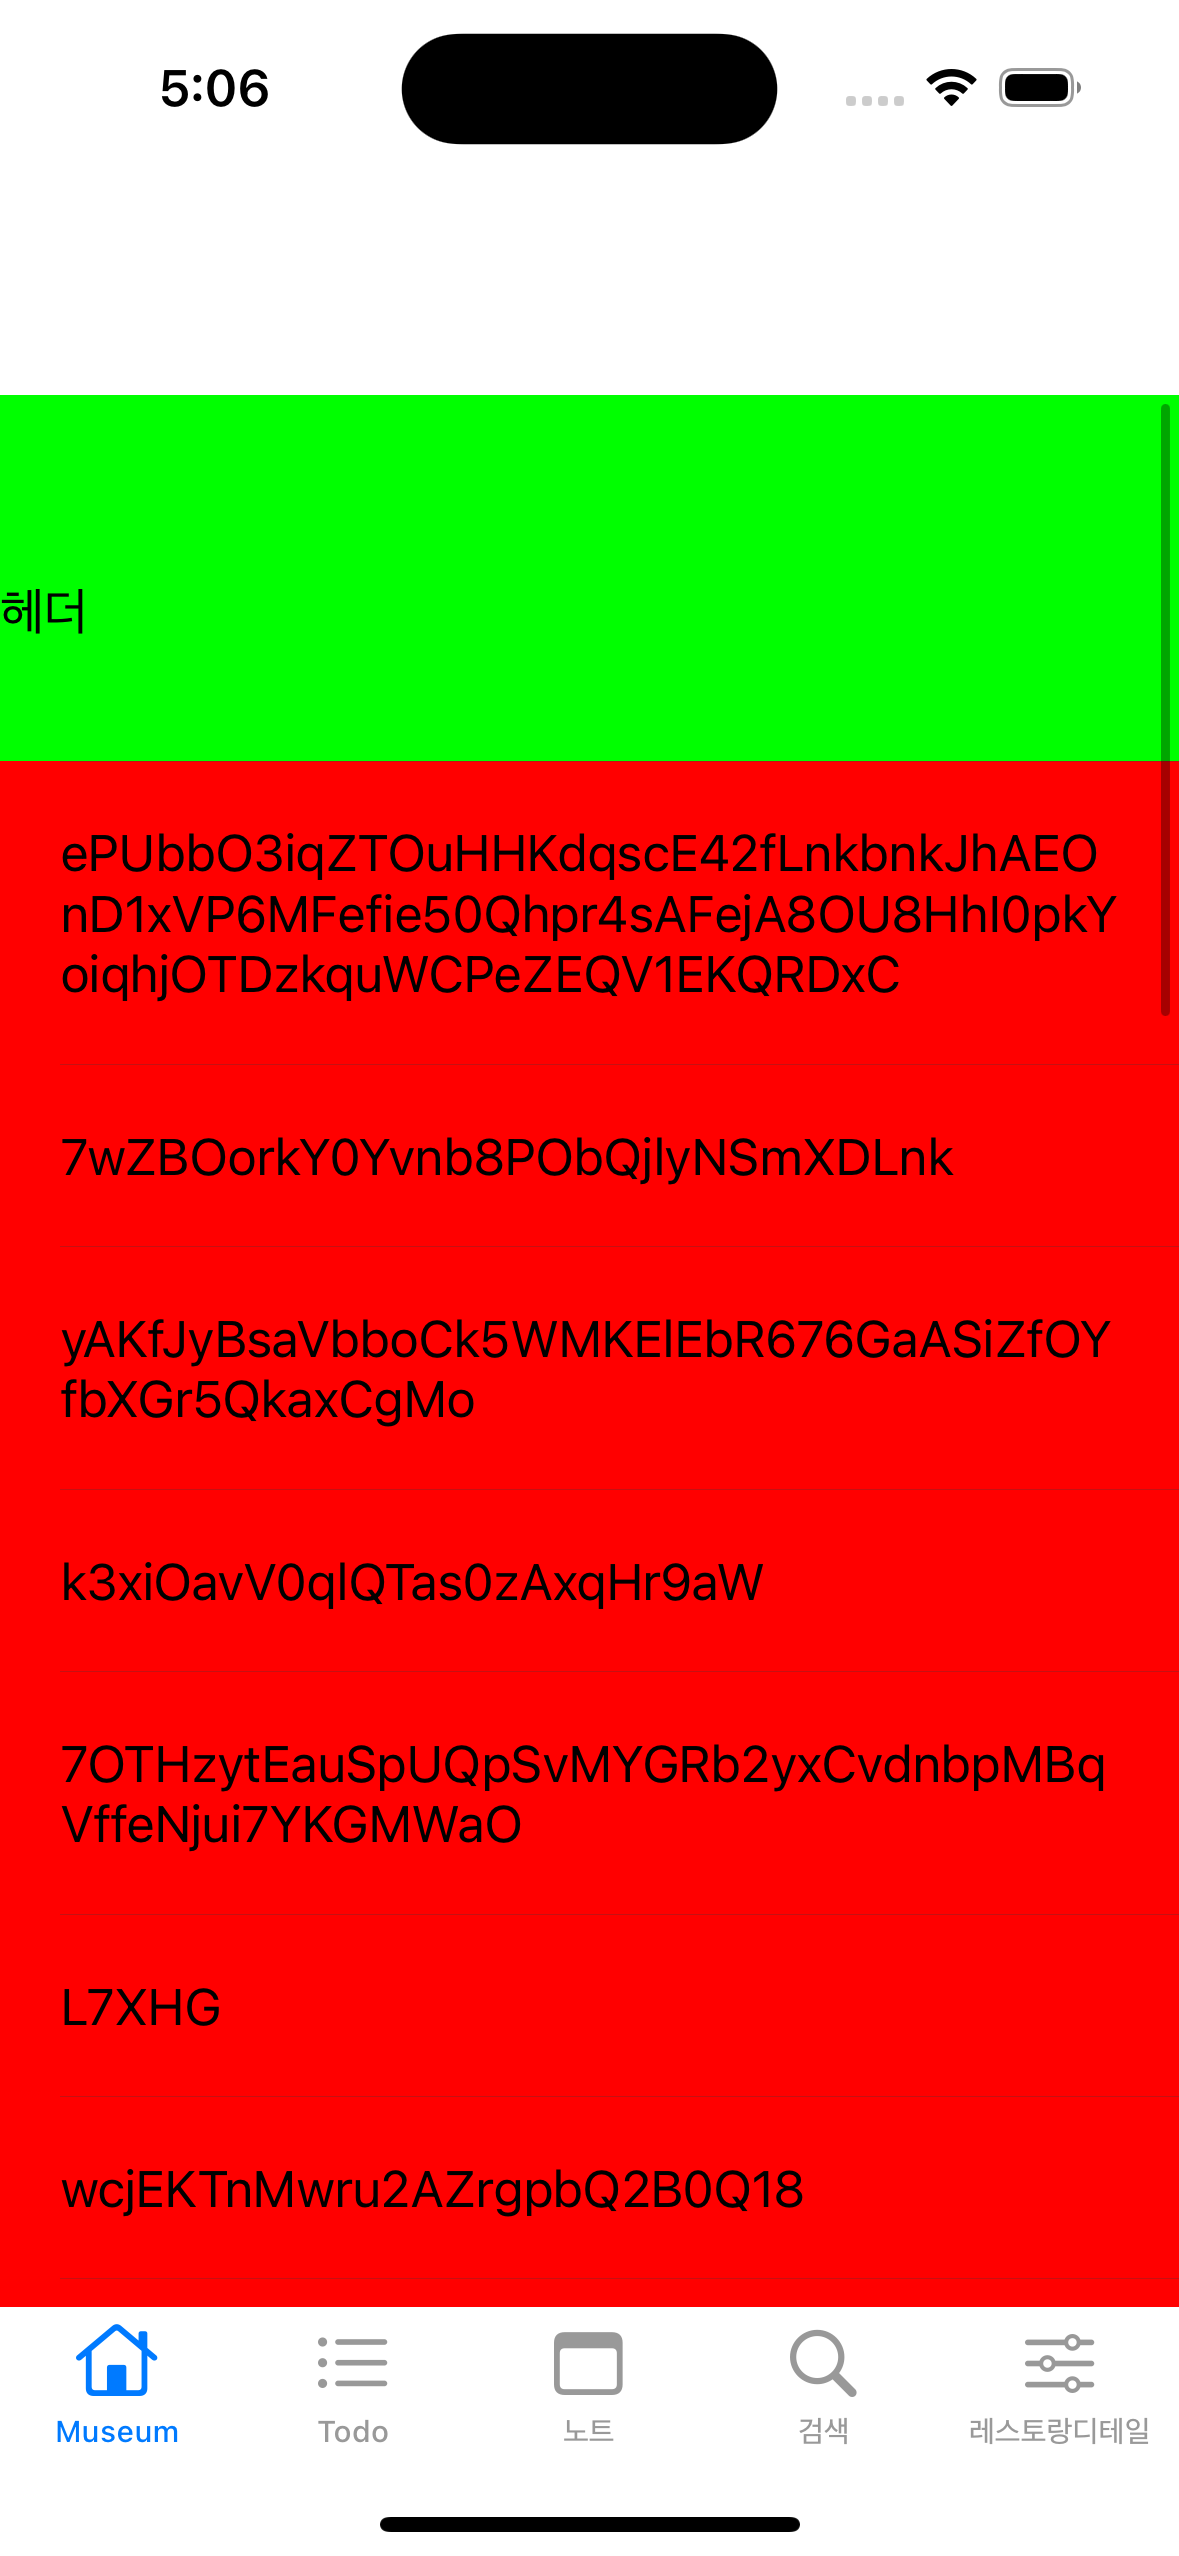
✅ 결과 이미지 ✅


샘플코드
//
//  MuseumViewController.swift
//  AppleCollectionView
//
//  Created by Hamlit Jason on 2022/09/18.
//

import UIKit
import SnapKit

final class MuseumViewController: UIViewController, UITableViewDelegate {

    // 🐬 1. 섹션 정의
    enum MySection: Int { // 1-1. Int를 상속받아야 section값 int로 찾을 수 있음
        case banner
        case number
    }

    // 🐬 2. 아이템 정의
    enum Item: Hashable {
        case bannerItem(String)
        case numberItem(Int)
    }

    // 🐬 3. 테이블 뷰 및 DataSource 선언
    var tableView = UITableView()
    var dataSource: UITableViewDiffableDataSource<MySection, Item>!

    var banners: [String] {
        [
            String.createRandomString(length: 100),
            String.createRandomString(length: 30),
            String.createRandomString(length: 50),
            String.createRandomString(length: 25),
            String.createRandomString(length: 50),
            String.createRandomString(length: 5),
            String.createRandomString(length: 25),
            String.createRandomString(length: 35),
            String.createRandomString(length: 45),
            String.createRandomString(length: 5),

        ]
    }
    var numbers: [Int] = [100000, 10000, 1000, 100, 10, 10, 12, 13, 14, 15, 16, 71, 81, 91, 31, 41, 1, 1, 1, 1]

    override func viewDidLoad() {
        super.viewDidLoad()
        setupTableView()

        fetchDataSource()
        fetchSnapShot()
    }

    func setupTableView() {
        // 🐬 4. 테이블 뷰 설정
        // 🐬 표시가 있는것이 diffable과 관련한 코드

        // 4-0. 테이블 뷰 view에 추가
        view.addSubview(tableView)
        // 4-1. header 및 footer를 사용하기 위해서
        tableView.delegate = self


        // 🐬 4-2. 테이블 뷰에 사용되는 cell 연결
        tableView.register(MuseumBannerCell.self, forCellReuseIdentifier: MuseumBannerCell.id)
        tableView.register(MuseumNumberCell.self, forCellReuseIdentifier: MuseumNumberCell.id)

        // 4-3. 테이블 뷰에 사용되는 헤더 view 연결
        tableView.register(MuseumHeaderView.self, forHeaderFooterViewReuseIdentifier: MuseumHeaderView.id)

        // 4-4. 레이아웃 및 배경색 지정
        tableView.backgroundColor = .green
        tableView.snp.makeConstraints {
            $0.edges.equalTo(view.safeAreaLayoutGuide)
        }
    }

    // 🐬 5. 스냅샷을 통한 데이터 연결 - ✅ 중요
    func fetchSnapShot() {
        // 🐬 5-1. 스냅샷 데이터 소스 만들기
        var snapshot = NSDiffableDataSourceSnapshot<MySection, Item>()
        // 🐬 5-2. 스냡샷에 섹션추가
        snapshot.appendSections([.banner, .number])
        // 🐬 5-3. 섹션를 구분하여 아이템 append
        banners.map { snapshot.appendItems([.bannerItem($0)], toSection: .banner) }
        numbers.map { snapshot.appendItems([.numberItem($0)], toSection: .number) }

        // 🐬 5-4. 데이터 소스에 적용!
        dataSource.apply(snapshot)

        /* 🚨 주의사항!
         섹션이 여러개일 경우 appendItems 시 toSection: 을 지정하지 않으면, 마지막 섹션에 데이터가 몰아서 처리된다.
         */

    }

    // 🐬 6. 데이터 소스 정의하기 - ✅ 매우 중요
    func fetchDataSource() {
        dataSource = UITableViewDiffableDataSource<MySection, Item>(
            tableView: tableView
        ) { tableView, indexPath, itemIdentifier in

            // 🐬 6-1. section 정의하기
            let section = MySection(rawValue: indexPath.section)

            print("section: \(section): indexPath \(indexPath): item \(itemIdentifier) \(type(of: itemIdentifier))")

            // 🐬 6-2. itemIdentifier를 가지고 아이템 값 추출하기
            var value: Any
            switch itemIdentifier {
            case .bannerItem(let item):
                value = item
            case .numberItem(let item):
                value = item
            }

            // 🐬 6-3. 섹션에 따른 값 설정하기
            switch section {
            case .banner:
                guard let cell = tableView.dequeueReusableCell(
                    withIdentifier: MuseumBannerCell.id,
                    for: indexPath
                ) as? MuseumBannerCell else { return UITableViewCell() }

                print("BANNER")

                cell.configureCell(with: value as! String)
                cell.backgroundColor = .red

                return cell

            case .number:
                guard let cell = tableView.dequeueReusableCell(
                    withIdentifier: MuseumNumberCell.id,
                    for: indexPath
                ) as? MuseumNumberCell else { return UITableViewCell() }

                print("NUMBER")
                cell.configureCell(with: value as! Int)
                cell.backgroundColor = .blue

                return cell
            default:
                return UITableViewCell()
            }
        }
    }

    // MARK: - Header

    func tableView(_ tableView: UITableView, viewForHeaderInSection section: Int) -> UIView? {
        if section == 0 {
            return MuseumHeaderView()
        } else {
            return MuseumHeaderView()
        }
    }

    func tableView(_ tableView: UITableView, heightForHeaderInSection section: Int) -> CGFloat {
        if section == 0 {
            return 100
        } else {
            return 150
        }
    }

    // MARK: FOOTER
    func tableView(_ tableView: UITableView, viewForFooterInSection section: Int) -> UIView? {
        return nil
    }

    func tableView(_ tableView: UITableView, heightForFooterInSection section: Int) -> CGFloat {
        return 0
    }
}


class MuseumBannerCell: UITableViewCell {
    static let id: String = "MuseumBannerCell"

    let title = UILabel()

    // MARK: - Initialize
    override init(style: UITableViewCell.CellStyle, reuseIdentifier: String?) {
        super.init(style: style, reuseIdentifier: reuseIdentifier)
        contentView.addSubview(title)
        title.numberOfLines = 0
        title.snp.makeConstraints {
            $0.edges.equalToSuperview().inset(20)
        }
    }

    required init?(coder: NSCoder) {
        fatalError("init(coder:) has not been implemented")
    }

    func configureCell(with item: String) {
        title.text = item
    }
}


final class MuseumNumberCell: UITableViewCell {
    static let id: String = "MuseumNumberCell"

    let title = UILabel()

    // MARK: - Initialize
    override init(style: UITableViewCell.CellStyle, reuseIdentifier: String?) {
        super.init(style: style, reuseIdentifier: reuseIdentifier)
        contentView.addSubview(title)
        title.snp.makeConstraints {
            $0.edges.equalToSuperview().inset(20)
        }
    }

    required init?(coder: NSCoder) {
        fatalError("init(coder:) has not been implemented")
    }

    func configureCell(with item: Int) {
        title.text = "\(item)"
    }
}

class MuseumHeaderView: UITableViewHeaderFooterView {
    static let id: String = "MuseumBannerHeaderView"
    let headerTitle = UILabel()

    override init(reuseIdentifier: String?) {
        super.init(reuseIdentifier: reuseIdentifier)
        addSubview(headerTitle)
        headerTitle.snp.makeConstraints {
            $0.edges.equalToSuperview()
        }
        headerTitle.text = "헤더"
    }

    required init?(coder: NSCoder) {
        fatalError("init(coder:) has not been implemented")
    }
}
String+
유틸파일
extension String {
    static func createRandomString(length: Int) -> String {
        let letters = "abcdefghijklmnopqrstuvwxyzABCDEFGHIJKLMNOPQRSTUVWXYZ0123456789"
        return String(
            (0..<length)
                .map { _ in letters.randomElement()! }
        )
    }
}
Apple Developer Documentation
developer.apple.com
'Apple > iOS, UIKit, Documentation' 카테고리의 다른 글
| Moya Unable to parse empty data 대응하기 (0) | 2022.09.29 |
|---|---|
| iOS CompositionalLayout (UICollectionView) (0) | 2022.09.18 |
| Realm 간단하게 구조 적용하기 (0) | 2022.09.06 |
| Realm Swift Migration (0) | 2022.09.05 |
| [Realm] The document “default.realm” could not be opened. (0) | 2022.09.05 |