#2 Geometry 다뤄보기
Geometry 다뤄보기
- 들어가기 전 간단정리
- Geometry: 우리가 원하는 어떤 물체 (ex. 정육면체, 구 등)
- Material: 지오메트리 표면에 어떤 효과를 주는것 (ex. 이미지 넣기, 색 넣기 등)
- Node: ARSceneView화면에 Geometry를 추가할건데, Node를 통해 좌표를 주어 넣을때 사용.
# SCNGeometry 클래스
material이 정의된 표면에 Scene에 표시할 수 있는 3차원 모양(model 또는 mesh라고도 부름)
SceneKit에서 SCNode 객체에 연결된 지오메트리는 Scene의 Visible 요소를 구성하며, 지오메트리에 연결된 SCNMaterial 객체는 그 모양을 결정합니다.
# Working with Geometry Objects
- Scene안에서의 materials와 node와 함께 geometry의 표면을 제어한다. gemetry 객체는 SceneKit에 의해서 visible한 객체로 렌더링 된다. 색상 및 텍스쳐를 geometry의 표면에 나타내고, 빛에 어떻게 반응할지 제어하며, 특별한 효과도 붙일 수 있다. Scene 안에서는 방향 또는 위치는 SCNode 객체에 의해 결정된다. 여러개의 노드들은 같은 지오메트리 객체를 참조할 수 있고 하나의 장면 안에서 여러 위치에 표현되는 것도 허락된다.
- 쉽게 materials을 변경하고 지오메트리들을 복사할 수 있다. 지오메트리 객체는 변하지 않는 vertex(정점) 데이터와 변할 수 있는 material을 할당하는 것 사이의 관계를 관리합니다. 동일한 Scene에서 다른 material을 두번이상 나타내려면 상속된 copy() 메소드를 사용하면 된다. 복사본은 원본의 기본 vertex 데이터를 공유하지만 독립적으로 material을 할당할 수 있다. 따라서 렌더링 성능에 큰 비용을 들이지 않고 지오메트리의 많은 복사본을 만들 수 있습니다.
- 지오메트리 객체에 애니메이션 넣을 수 있다. 지오메트리와 연관된 vertext데이터는 변경할 수 없지만 SceneKit은 지오메트리에서 애니메이션을 사용하는 몇몇 방법을 제공한다. SCNMorpher 또는 SCNSkinner 객체를 사용해서 지오메트리의 표면을 변형시킬 수 있고, 외부 3D 도구에서 생성되어 Scene 파일에서 로드된 애니메이션을 실행할 수 있다. 또한 SCNShadable 프로토콜 메셔드를 사용하여 SceneKit의 지오메트리 렌더링을 변경하는 GLSL 쉐이더 프로그램을 추가할 수 있다.
# animation
- SCNMorpher 클래스
노드의 base 지오메트리와 하나 이상의 타겟 지오메트리들의 부드러운 트랜지션(전환) 관리하는 객체.
class SCNMorpher : NSObject

SCMorpher 객체를 해당 morpher 속성을 사용하여 노드와 연결하여 이러한 트랜지션을 제어할 수 있다. morpher는 대상 지오메트리 배열 및 각각에 연결된 일련의 가중치를 유지합니다. 모든 가중치가 0이면 지표면은 노드의 지오메트리 속성에서 기본 지오메트리의 형태를 취합니다. setWeight(_:forTargetAt:) 메서드를 사용하여 가중치를 1.0으로 증가시키면 지표면은 morpher의 대상 배열에서 해당 인덱스에서 지오메트리의 형태를 취합니다. 여러 대상에 대해 다양한 가중치를 사용하는 경우 지표면은 대상 지오메트리 사이에 비례적으로 보간하는 형태를 취합니다.
또한 keypath 애니메이션을 사용하여 암묵적으로 또는 명시적으로 가중치를 애니메이션할 수 있습니다. 예를 들어, 다음 코드는 하나의 목표 가중치를 앞뒤로 반복적으로 전환하는 형태 애니메이션을 만듭니다.
// objc
CABasicAnimation *animation = [CABasicAnimation animationWithKeyPath:@"morpher.weights[0]"];
animation.fromValue = @0.0;
animation.toValue = @1.0;
animation.autoreverses = YES;
animation.repeatCount = INFINITY;
animation.duration = 5;
[node addAnimation:animation forKey:nil];

// swift
import QuartzCore

let animation = CABasicAnimation(keyPath: "morpher.weights[0]")
animation.fromValue = 0.0
animation.toValue = 1.0
animation.autoreverses = true
animation.repeatCount = .infinity
animation.duration = 5

node.addAnimation(animation, forKey: nil)
morpher와 해당 지오메트리는 scene 파일에서 로드되거나 프로그래밍 방식으로 작성할 수 있음. 기본 지오메트리와 대상 지오메트리는 위상학적으로 동일해야 즉, 동일한 개수와 vertex의 배열을 포함해야 한다.
- SCNSkinner 클래스
골격 애니메이션과 애니메이션화하는 노드 및 지오메트리 사이의 관계를 관리하는 개체입니다.
class SCNSkinner : NSObject
skeletal 애니메이션은 게임의 휴머노이드 캐릭터와 같은 복잡한 지오메트리들의 애니메이션을 단순화하는 기술입니다. 애니메이션 스켈레톤은 컨트롤 노드의 단순한 계층 구조로, 그 자체로는 보이는 지오메트리가 없습니다. 스켈레톤을 지오메트리와 연결(스켈레톤 "스키닝" 또는 스킨된 모델 생성이라고도 함)하면 아래와 같이 스켈레톤의 제어 노드를 이동할 때 SceneKit이 자동으로 지오메트리를 변형할 수 있다.

일반적으로 아티스트(디자이너)는 skinned model을 외부 3D authoring(프로그래밍 언어를 사용하지 않는) 도구를 사용해 만듭니다. 스켈레톤을 사용하는 애니메이션과 함께 장면 파일에서 모델을 로드하고, Scene 파일에서 로드된 애니메이션 객체를 사용하거나 스켈레톤의 노드를 직접 조작하여 앱에서 포즈를 취하거나 애니메이션합니다.
init(baseGeometry:bones:boneInverseBindTransforms:boneWeights:boneIndices:) 을 사용해 별도로 정의한 스켈레톤 데이터에서 skinned 모델을 생성할 수도 있음.
skinned 모델의 skeleton을 사용하려면 모델의 루트 노드의 스키너 속성을 사용합니다. 예를 들어, 하나의 파일은 애니메이션 게임 캐릭터를 포함할 수 있고, 다른 파일은 캐릭터가 착용할 액세서리(모자 또는 백팩 등)를 포함할 수 있습니다. 3D 제작 도구를 사용하는 디자이너는 캐릭터와 액세서리가 동일한 골격을 사용하여 애니메이션화되도록 지정할 수 있습니다. 다음 예와 같이 캐릭터에 모자를 부착하여 함께 애니메이션화하도록 하면 모자의 애니메이션화를 담당하는 스킨너 객체를 애니메이션 캐릭터와 관련된 골격에 연결할 수 있습니다:
// objc
SCNNode *hero = [SCNScene sceneNamed:@"Hero"].rootNode;
SCNNode *hat = [SCNScene sceneNamed:@"FancyFedora"].rootNode;
hat.skinner.skeleton = hero.skinner.skeleton;

// swift
import SceneKit

let hero = SCNScene(named: "Hero")!.rootNode
let hat = SCNScene(named: "FancyFedora")!.rootNode
hat.skinner?.skeleton = hero.skinner?.skeleton
# Obtaining a Geometry Object
SceneKit은 객체를 앱에 도입하는 몇가지 방법을 제공함.

# Sample Code
샘플 코드를 통해 몇가지만 알아볼 예정.
다양한 옵션을 줄 수 있지만 해당 옵션에 대한 개념은 OpenGL 키워드를 기반으로 학습하는게 더 나음.
(학생때 컴퓨터 그래픽스 들은게 엄청 도움되어서 새삼 놀라는중,,)
//
// ViewController.swift
// HelloVision
//
// Created by Karrot on 2023/08/12.
//
import UIKit
import SceneKit
import ARKit
import SnapKit
class ViewController: UIViewController {
// MARK: - Property
// MARK: - execute
private func execute() {
make_box()
}
// MARK: - UIComponents
private lazy var sceneView: ARSCNView = {
$0.delegate = self
$0.showsStatistics = true
return $0
}(ARSCNView())
}
extension ViewController {
func make_ship() {
let scene = SCNScene(named: "art.scnassets/ship.scn")!
sceneView.scene = scene
}
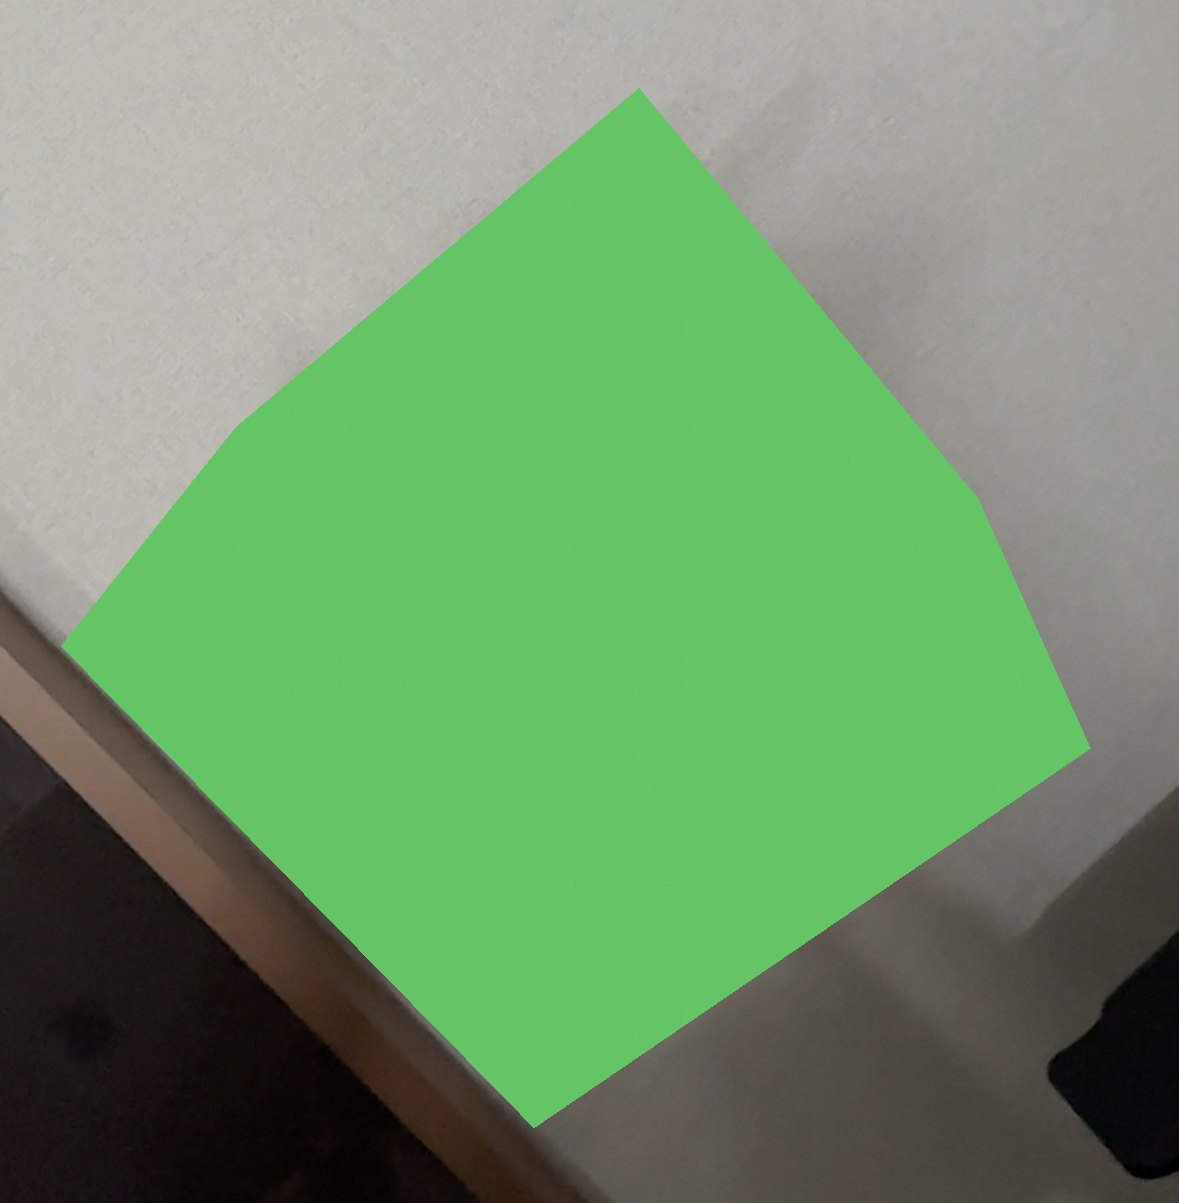
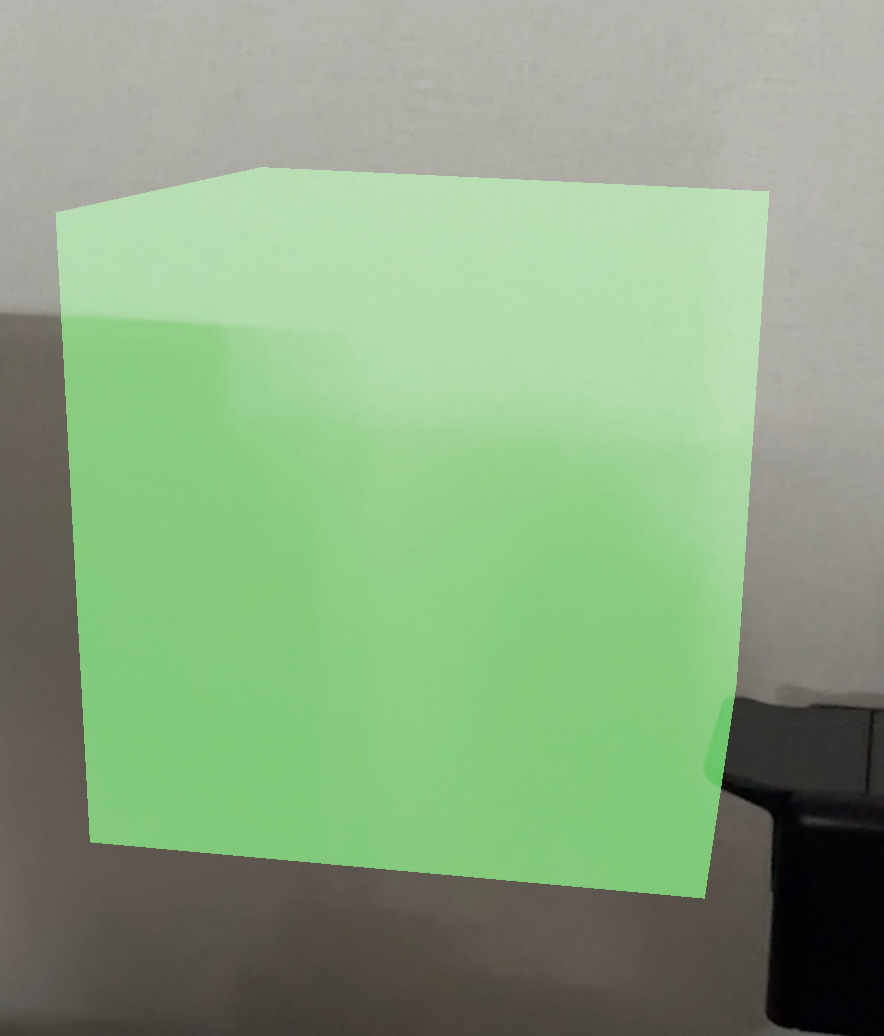
func make_box() {
let scene = SCNScene()
let box: SCNGeometry = SCNBox(width: 0.2, height: 0.2, length: 0.2, chamferRadius: 0)
let material = SCNMaterial()
material.diffuse.contents = UIColor.systemGreen
material.blendMode = .screen
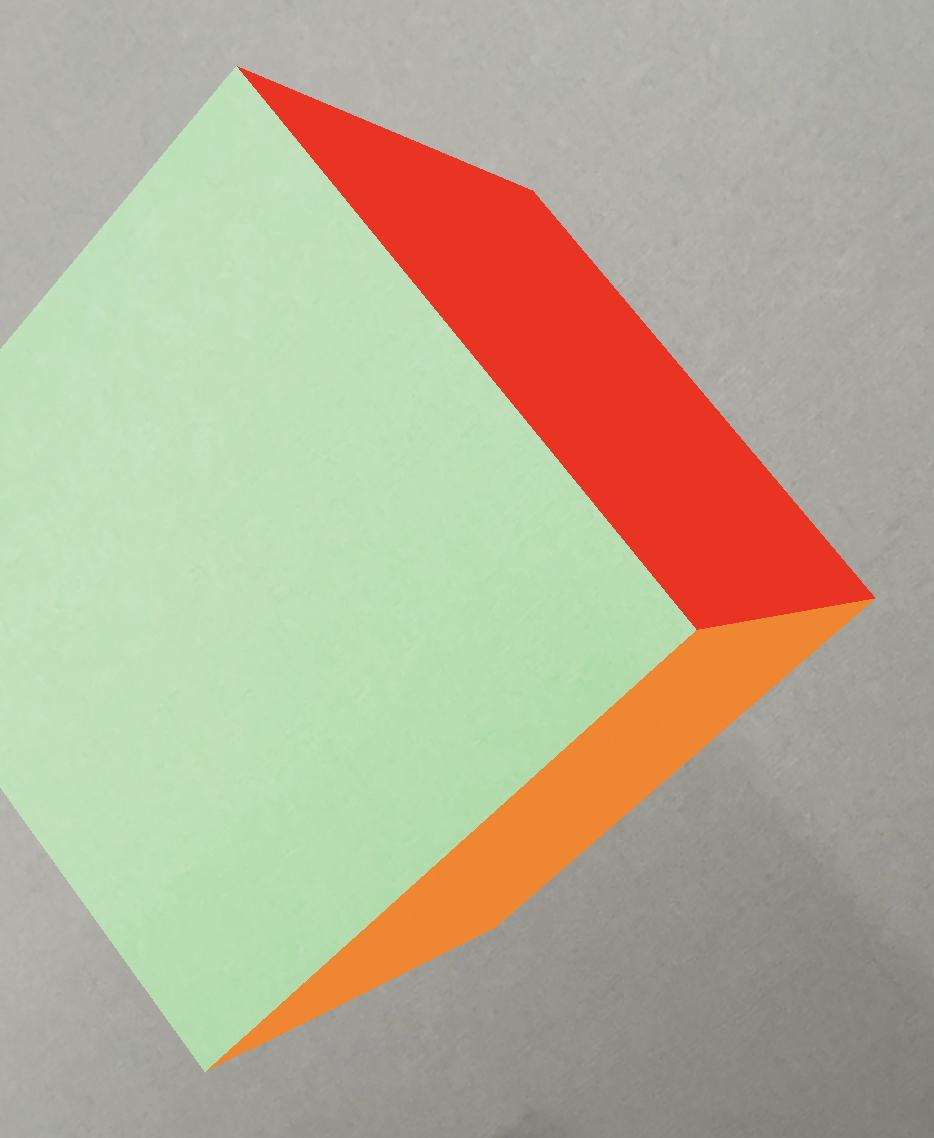
let material2 = SCNMaterial()
material2.diffuse.contents = UIColor.red
let material3 = SCNMaterial()
material3.diffuse.contents = UIColor.orange
let node = SCNNode()
node.geometry = box
node.geometry?.materials = [material, material2, material3]
node.position = SCNVector3(0, 0.1, -0.5) // SCNVector3는 물체의 위치 지정
scene.rootNode.addChildNode(node)
sceneView.scene = scene
}
}
extension ViewController {
// MARK: - LifeCycle & bind
override func viewDidLoad() {
super.viewDidLoad()
configureUI()
execute()
}
override func viewWillAppear(_ animated: Bool) {
super.viewWillAppear(animated)
let configuration = ARWorldTrackingConfiguration()
sceneView.session.run(configuration)
}
override func viewWillDisappear(_ animated: Bool) {
super.viewWillDisappear(animated)
sceneView.session.pause()
}
private func configureUI() {
view.addSubview(sceneView)
sceneView.snp.makeConstraints {
$0.edges.equalToSuperview()
}
}
}
extension ViewController: ARSCNViewDelegate {
// MARK: - ARSCNViewDelegate
/*
// Override to create and configure nodes for anchors added to the view's session.
func renderer(_ renderer: SCNSceneRenderer, nodeFor anchor: ARAnchor) -> SCNNode? {
print(#function)
let node = SCNNode()
return node
}
*/
func session(_ session: ARSession, didFailWithError error: Error) {
// Present an error message to the user
print(#function)
}
func sessionWasInterrupted(_ session: ARSession) {
// Inform the user that the session has been interrupted, for example, by presenting an overlay
print(#function)
}
func sessionInterruptionEnded(_ session: ARSession) {
// Reset tracking and/or remove existing anchors if consistent tracking is required
print(#function)
}
}
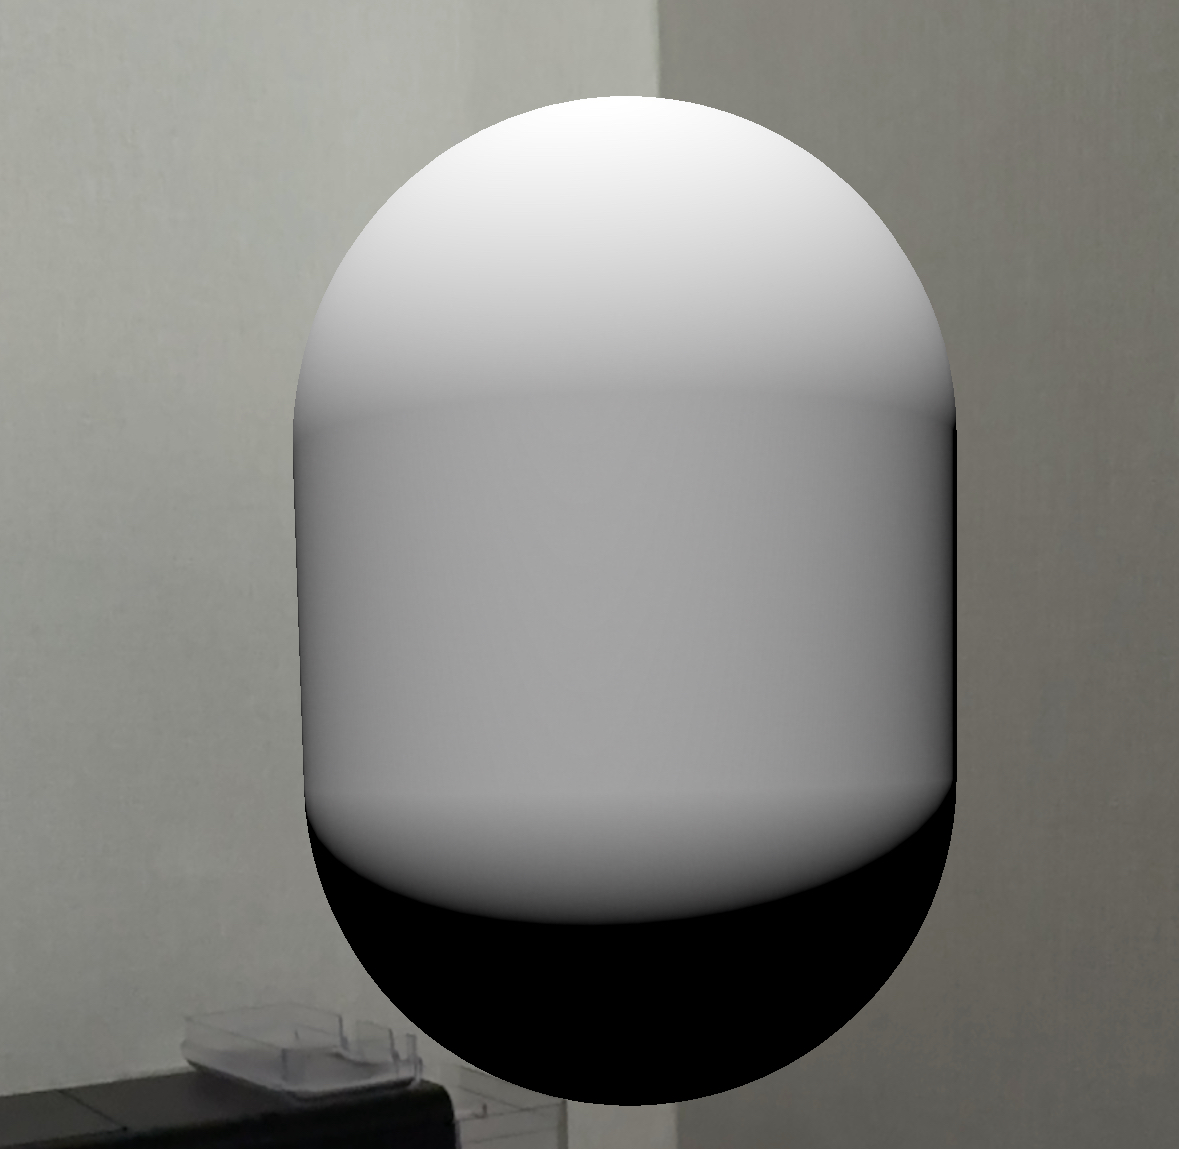
// 좌
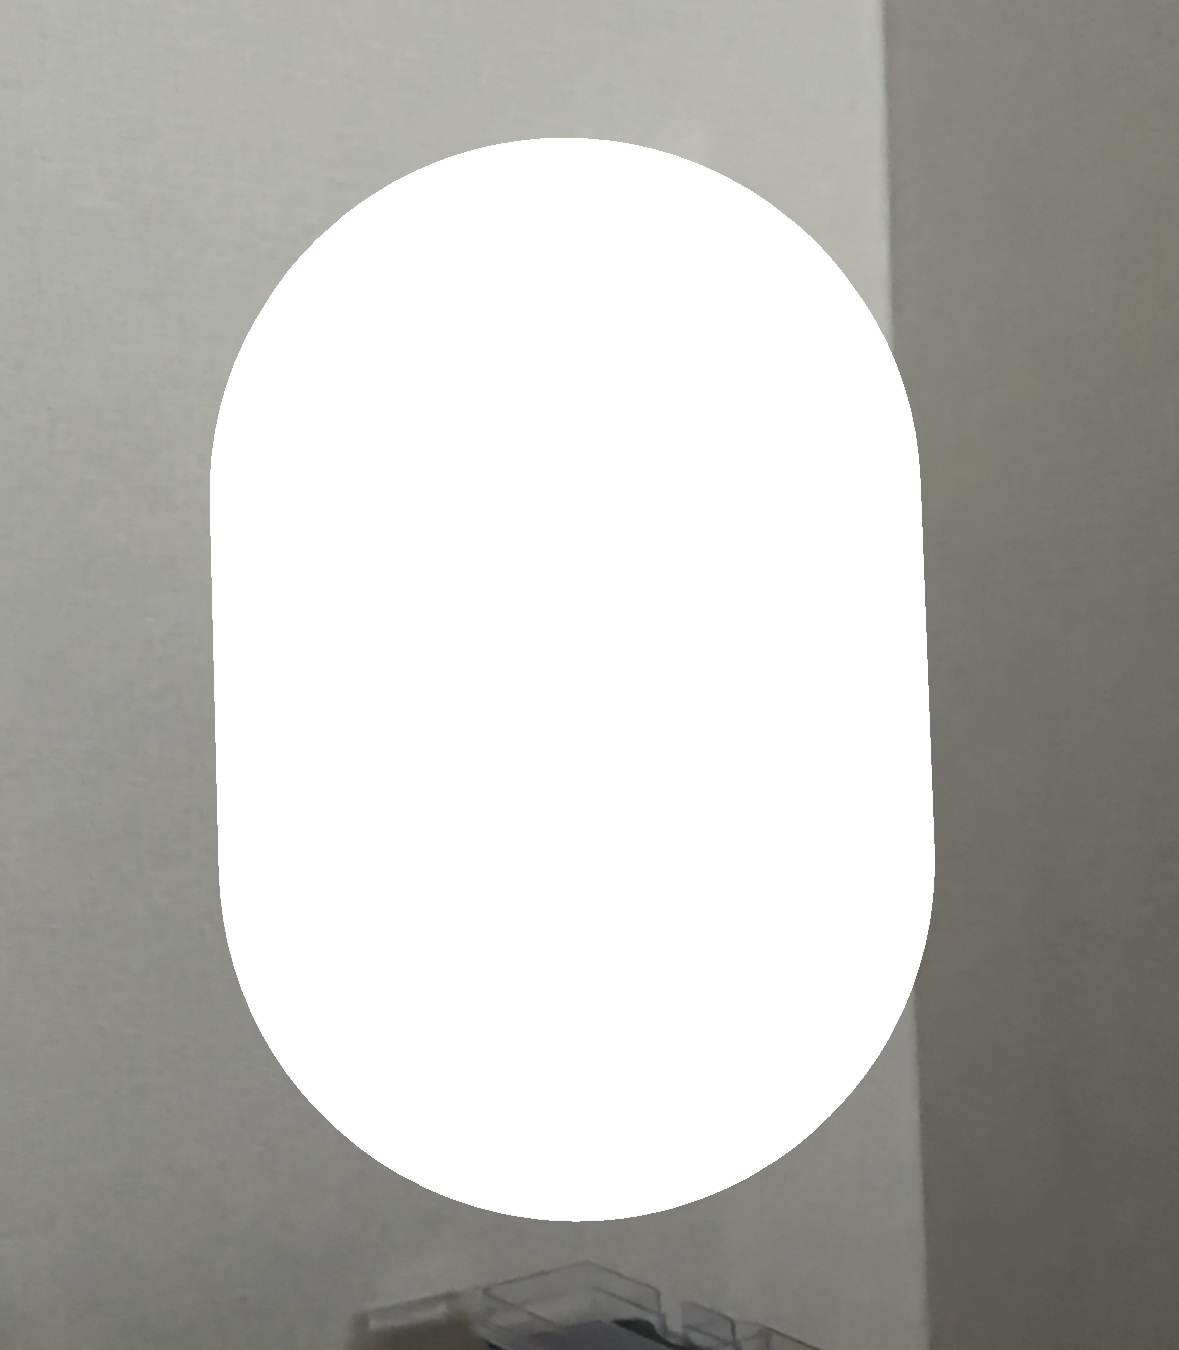
func make_capsule() {
let scene = SCNScene()
arSceneView.scene = scene
let capsuleGeometry = SCNCapsule(capRadius: 0.1, height: 0.3)
let capsuleNode = SCNNode(geometry: capsuleGeometry)
capsuleNode.position = SCNVector3(0, 0, -0.5) // 시작 위치 설정
scene.rootNode.addChildNode(capsuleNode)
}
// 중간
func make_capsule() {
// Scene 생성
let scene = SCNScene()
arSceneView.scene = scene
// Capsule 생성 및 추가
let capsuleGeometry = SCNCapsule(capRadius: 0.1, height: 0.3)
let capsuleMaterial = SCNMaterial()
capsuleNode.position = SCNVector3(0, 0, -0.5) // 시작 위치 설정
scene.rootNode.addChildNode(capsuleNode)
// // 빛 추가
let lightNode = SCNNode()
lightNode.light = SCNLight()
lightNode.light?.type = .omni
lightNode.position = SCNVector3(0, 1, 0) // 빛의 위치 설정
scene.rootNode.addChildNode(lightNode)
}
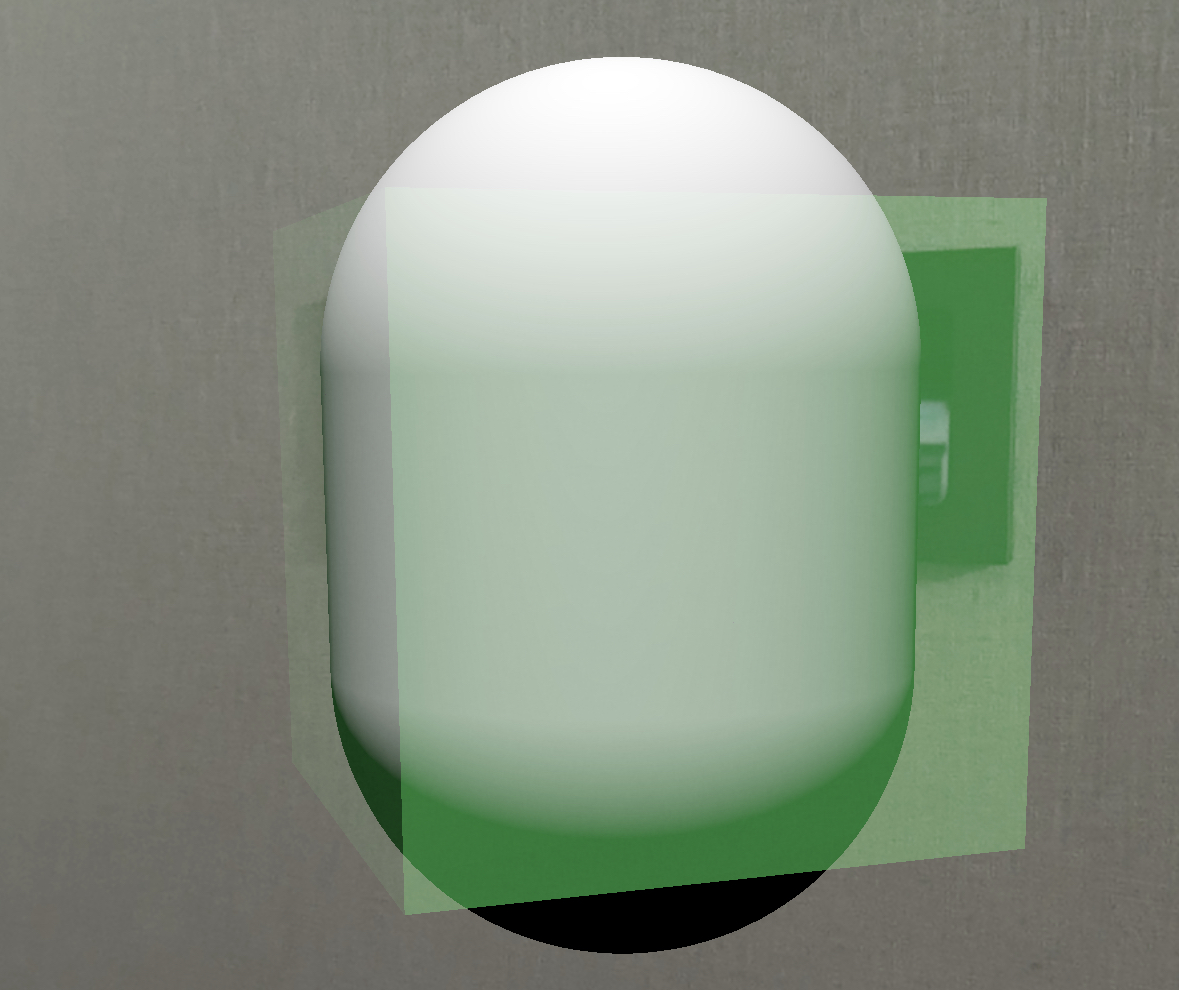
// 우
func make_capsule() {
// Scene 생성
let scene = SCNScene()
arSceneView.scene = scene
// Capsule 생성 및 추가
let capsuleGeometry = SCNCapsule(capRadius: 0.1, height: 0.3)
let capsuleMaterial = SCNMaterial()
capsuleMaterial.diffuse.contents = UIColor.systemGreen
capsuleMaterial.blendMode = .screen
let capsuleNode = SCNNode(geometry: capsuleGeometry)
capsuleNode.geometry?.materials = [capsuleMaterial]
capsuleNode.position = SCNVector3(0, 0, -0.5) // 시작 위치 설정
scene.rootNode.addChildNode(capsuleNode)
// // 빛 추가
let lightNode = SCNNode()
lightNode.light = SCNLight()
lightNode.light?.type = .omni
lightNode.position = SCNVector3(0, 1, 0) // 빛의 위치 설정
scene.rootNode.addChildNode(lightNode)
}
// 카메라도 추가할 수 있음 해당 개념은 OpenGL을 더 학습하길 바람.
func make_capsule() {
// Scene 생성
let scene = SCNScene()
arSceneView.scene = scene
// 카메라 생성
let cameraNode = SCNNode()
cameraNode.camera = SCNCamera()
cameraNode.position = SCNVector3(x: 0, y: 0, z: 5)
scene.rootNode.addChildNode(cameraNode)
// Capsule 생성 및 추가
let capsuleGeometry = SCNCapsule(capRadius: 0.1, height: 0.3)
let capsuleMaterial = SCNMaterial()
capsuleMaterial.diffuse.contents = UIColor.systemGreen
capsuleMaterial.blendMode = .replace
let capsuleNode = SCNNode(geometry: capsuleGeometry)
capsuleNode.geometry?.materials = [capsuleMaterial]
capsuleNode.position = SCNVector3(0, 0, -0.5) // 시작 위치 설정
scene.rootNode.addChildNode(capsuleNode)
// // 빛 추가
let lightNode = SCNNode()
lightNode.light = SCNLight()
lightNode.light?.type = .omni
lightNode.position = SCNVector3(0, 1, 0) // 빛의 위치 설정
scene.rootNode.addChildNode(lightNode)
}

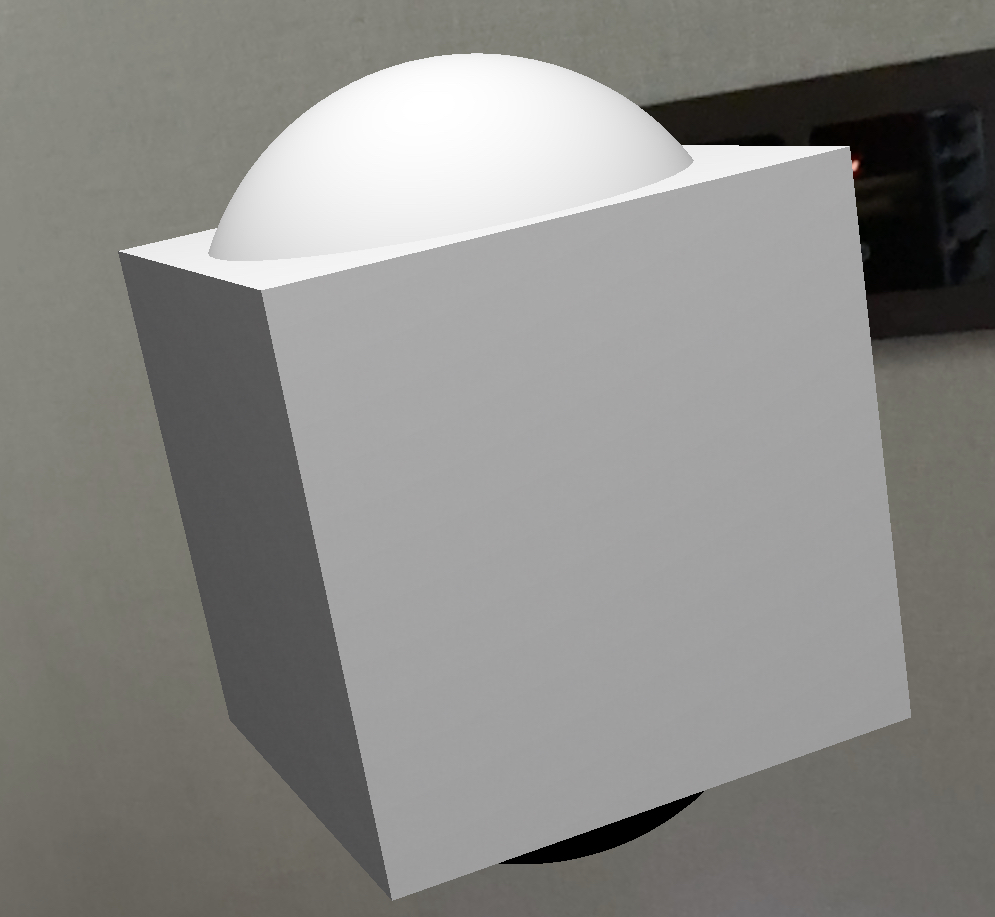
도형을 겹치기도 가능함.
func make_geometries() {
        // Scene 생성
        let scene = SCNScene()
        arSceneView.scene = scene

        // Box 생성 및 추가
        let boxGeometry = SCNBox(width: 0.2, height: 0.2, length: 0.2, chamferRadius: 0)

        let boxMaterial = SCNMaterial()
        boxMaterial.diffuse.contents = UIColor.systemGreen
        boxMaterial.blendMode = .subtract

        let boxNode = SCNNode(geometry: boxGeometry)
        boxNode.geometry?.materials = [boxMaterial]
        boxNode.position = SCNVector3(0.2, 0, -0.5) // 시작 위치 설정
        scene.rootNode.addChildNode(boxNode)

        // Capsule 생성 및 추가
        let capsuleGeometry = SCNCapsule(capRadius: 0.1, height: 0.3)
        let capsuleNode = SCNNode(geometry: capsuleGeometry)
        capsuleNode.position = SCNVector3(0.2, 0, -0.5) // 시작 위치 설정
        scene.rootNode.addChildNode(capsuleNode)

        // 빛 추가
        let lightNode = SCNNode()
        lightNode.light = SCNLight()
        lightNode.light?.type = .omni
        lightNode.position = SCNVector3(0, 1, 0) // 빛의 위치 설정
        scene.rootNode.addChildNode(lightNode)
    }

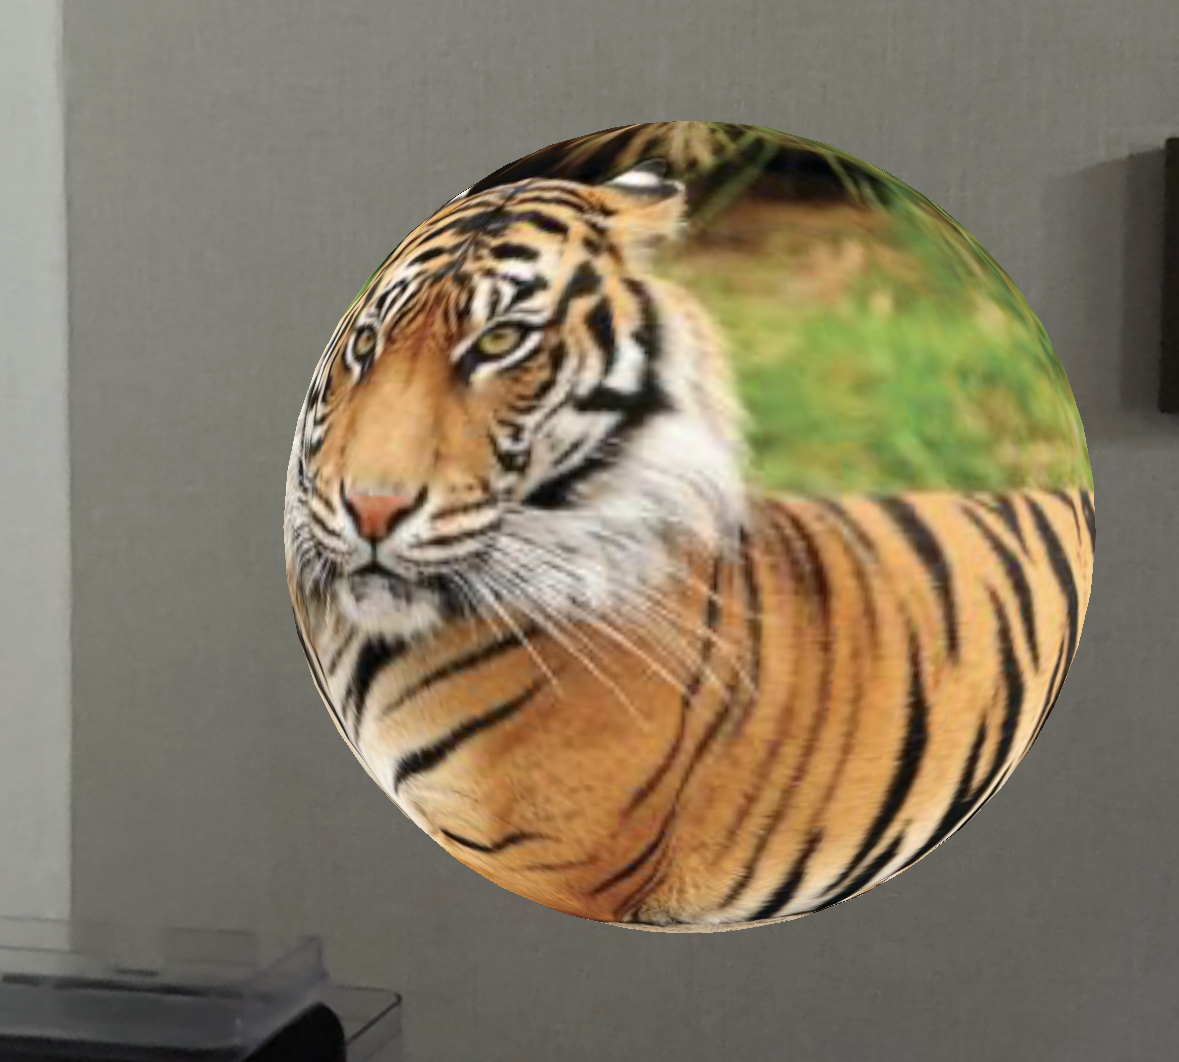
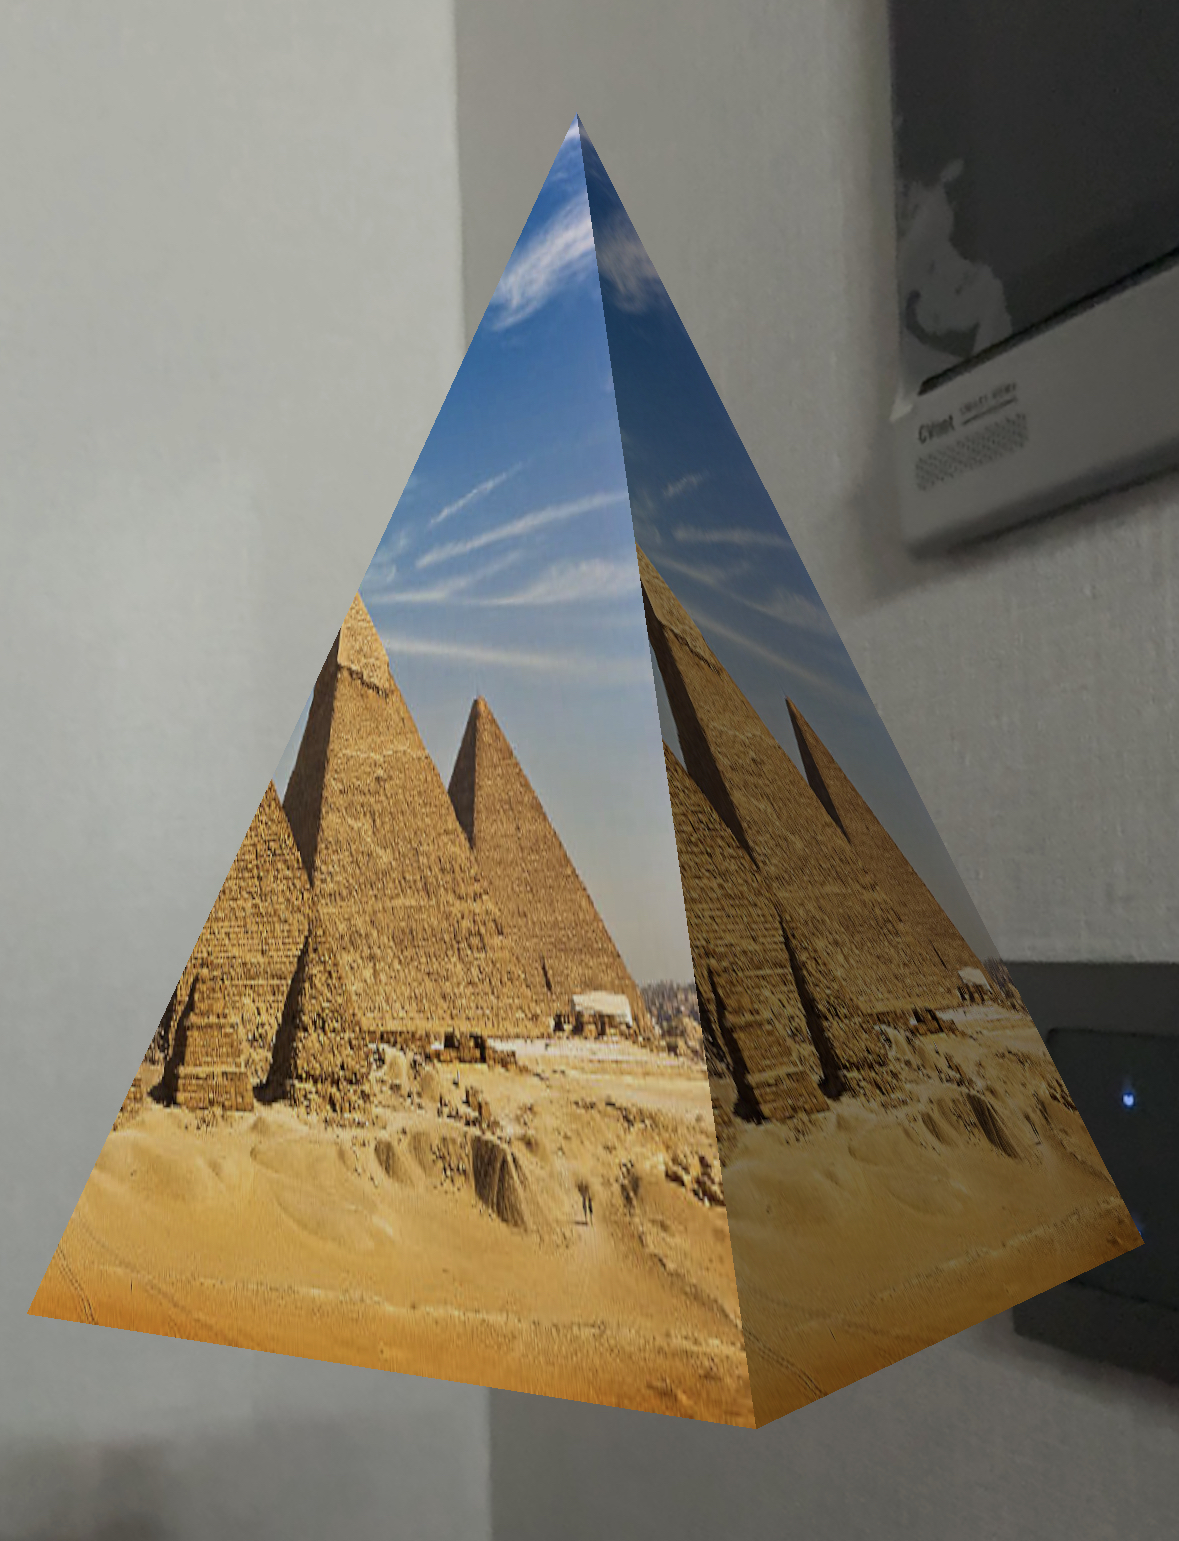
이미지도 넣어줄 수 있으며 firstMaterial을 통해 배열이랑 조금 다르게 제작했다.
func make_image() {
        let scene = SCNScene()
        arSceneView.scene = scene

//        let sphereGeometry = SCNSphere(radius: 0.1)
        let sphereGeometry = SCNPyramid(width: 0.2, height: 0.3, length: 0.2)
        let sphereNode = SCNNode(geometry: sphereGeometry)
        sphereNode.position = SCNVector3(0, 0, -0.5) // 시작 위치 설정
        scene.rootNode.addChildNode(sphereNode)

        let material = SCNMaterial()
        material.diffuse.contents = UIImage(named: "pyramid_full") // 이미지 이름으로 설정
        sphereGeometry.firstMaterial = material

        // 빛 추가
        let lightNode = SCNNode()
        lightNode.light = SCNLight()
        lightNode.light?.type = .omni
        lightNode.position = SCNVector3(0, 1, 0) // 빛의 위치 설정
        scene.rootNode.addChildNode(lightNode)
    }

(참고)
https://developer.apple.com/documentation/scenekit/scngeometry#1655044
SCNGeometry | Apple Developer Documentation
A three-dimensional shape (also called a model or mesh) that can be displayed in a scene, with attached materials that define its appearance.
developer.apple.com
https://sujinnaljin.medium.com/arkit-1-%EB%B0%95%EC%8A%A4-%EB%A7%8C%EB%93%A4%EA%B8%B0-ed9480d75a5c
ARKit — 1. 박스 만들기
본글은 ARKit 동영상 강의를 기반으로 작성한 글입니다. 출처는 아래에서 확인할 수 있습니다.
sujinnaljin.medium.com
https://developer.apple.com/documentation/scenekit/scnmorpher
SCNMorpher | Apple Developer Documentation
An object that manages smooth transitions between a node's base geometry and one or more target geometries.
developer.apple.com
https://developer.apple.com/documentation/scenekit/scnskinner
SCNSkinner | Apple Developer Documentation
An object that manages the relationship between skeletal animations and the nodes and geometries they animate.
developer.apple.com
'apple > VisionOS, ARKit' 카테고리의 다른 글
| [ARKit] #6 ARKit in iOS (1) | 2023.08.15 |
|---|---|
| [SceneKit] #5 SCNSceneRendererDelegate (0) | 2023.08.15 |
| [SceneKit] #4 SCNAction (1) | 2023.08.13 |
| [SceneKit] #3 Animating SceneKit Content (0) | 2023.08.13 |
| [ARKit] #1 ARKit 시작하기 (0) | 2023.08.12 |