iOS SnapKit 공식문서로 공부하기 10탄 (UICollectionView 코드로 구성하기 3편)
Rxswift를 사용하고 FlowLayout에 상하 간격을 넣어보자.
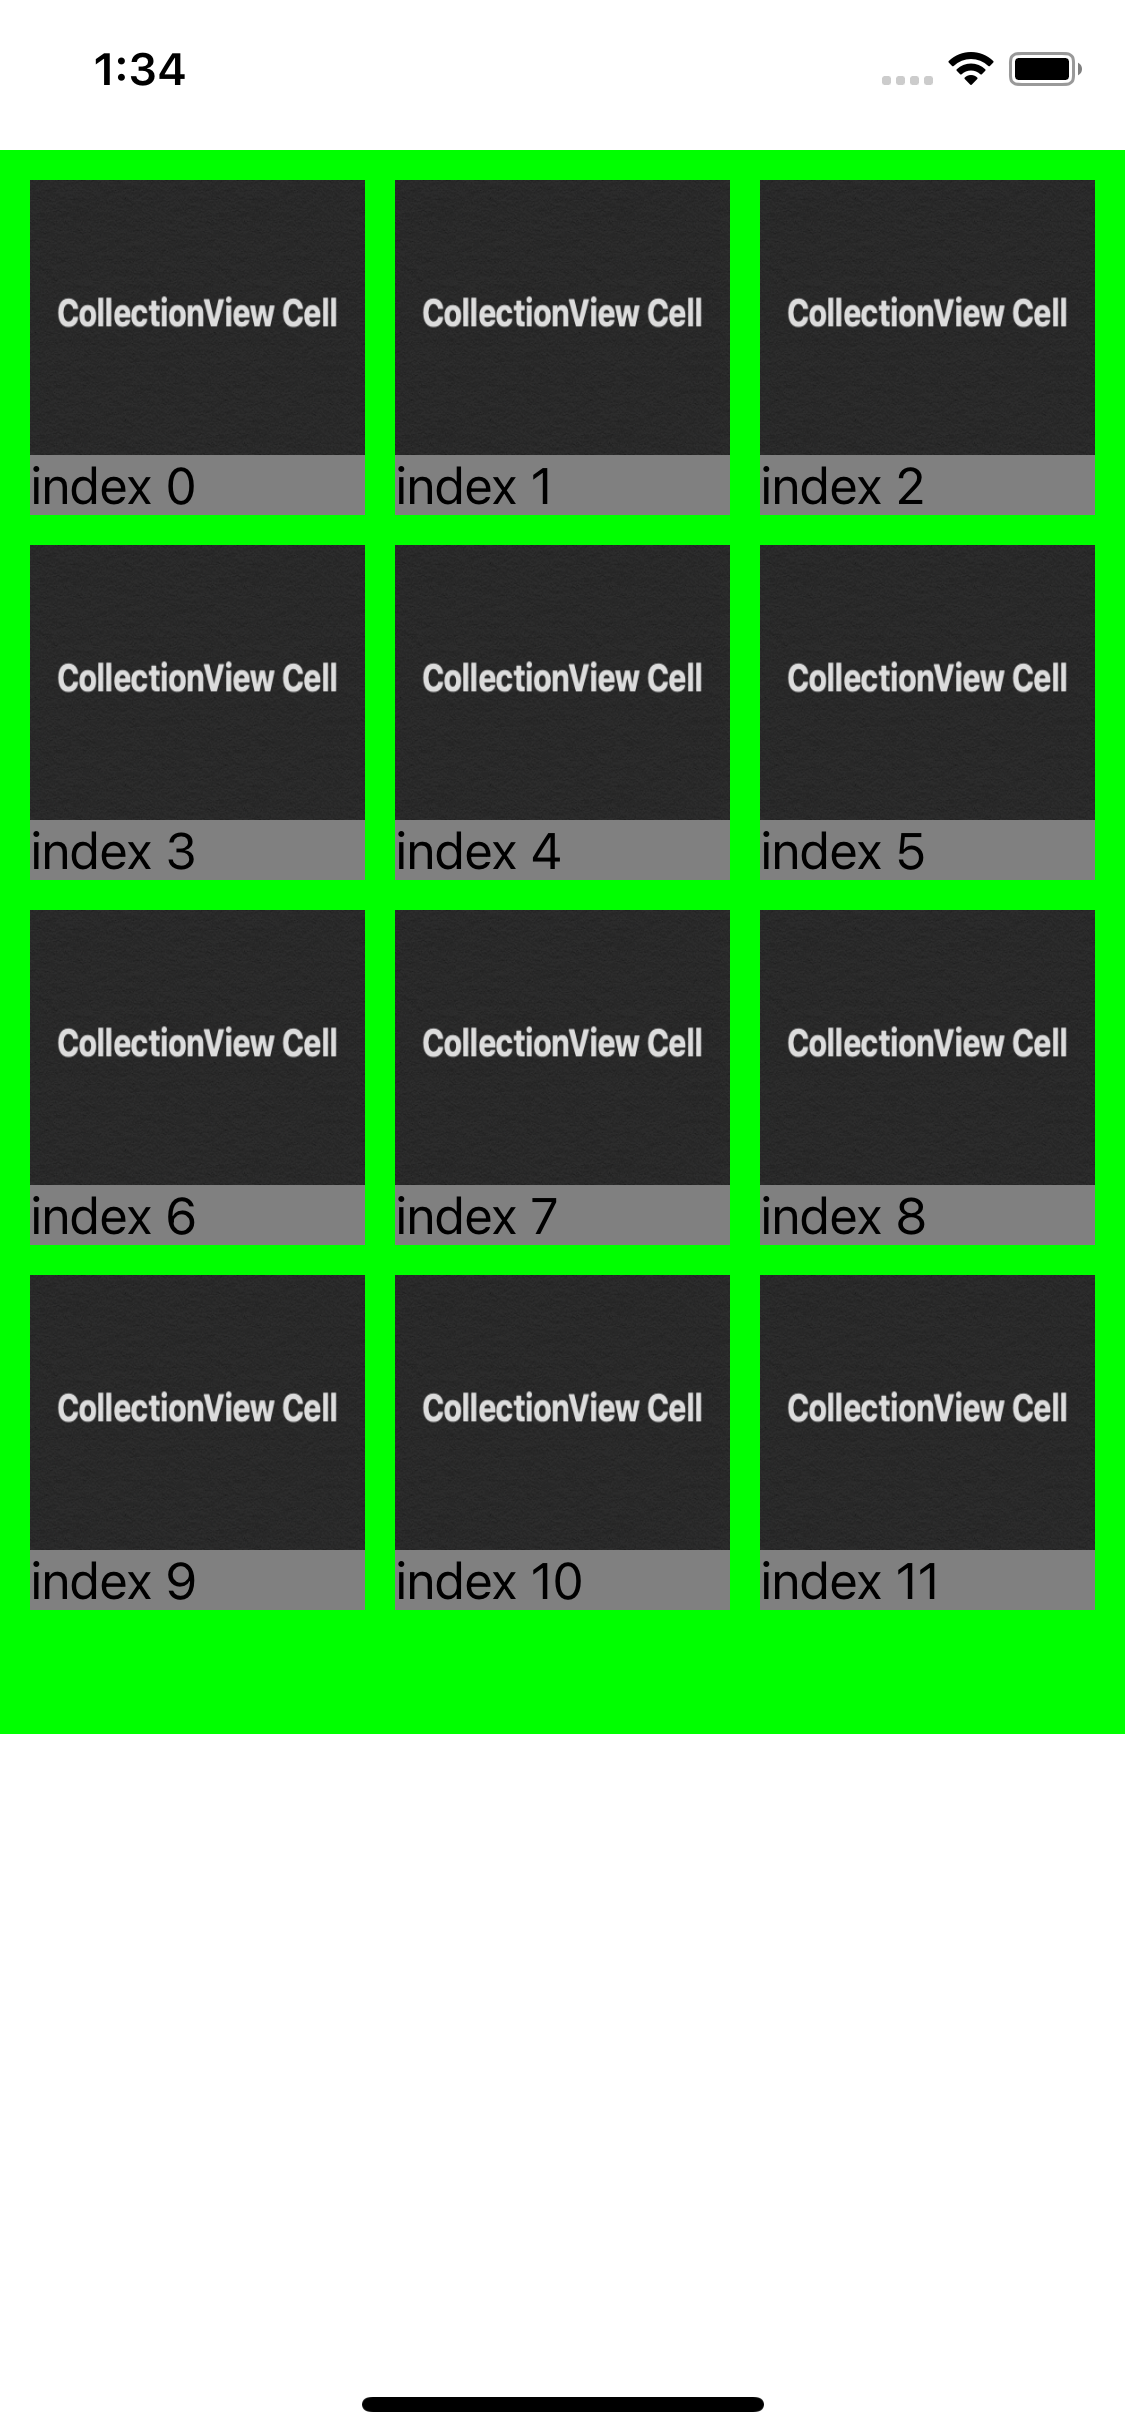
결과 스크린샷

전체 코드
//
//  UICollectionView.swift
//  SnapKitPractice
//
//  Created by Hamlit Jason on 2021/08/22.
//

import Then
import UIKit
import RxSwift
import RxCocoa
import RxDataSources

class MyCollectionViewCell3 : UICollectionViewCell {
    static let identifier = "cell3"

    var img = UIImageView().then {
        $0.translatesAutoresizingMaskIntoConstraints = false
        $0.image = UIImage(named: "testImage")
    }

    var label = UILabel().then {
        $0.translatesAutoresizingMaskIntoConstraints = false
        $0.text = "상어상어"
    }

    override init(frame: CGRect) {
        super.init(frame: frame)
        self.cellSetting()
    }

    required init?(coder: NSCoder) {
        fatalError("init(coder:) has not been implemented")
    }

    func cellSetting() {
        self.backgroundColor = .gray
        self.addSubview(img)
        self.addSubview(label)

        img.contentMode = .scaleToFill
        img.snp.makeConstraints {
            $0.leading.top.trailing.equalTo(0)
            $0.bottom.equalTo(-20)
        }
        label.snp.makeConstraints {
            $0.leading.bottom.trailing.equalTo(0)
            $0.top.equalTo(img.snp.bottom)
        }
    }
}

class ViewController10 : UIViewController {

    var array = ["first","second","third","fourth","fifth","6","7","8","9","10","11","12"]

    var collectionView : UICollectionView = {
        var layout = UICollectionViewFlowLayout()
        layout.minimumLineSpacing = 0
        layout.scrollDirection = .vertical
        layout.sectionInset = .zero

        let cv = UICollectionView(frame: .zero, collectionViewLayout: layout)
        cv.backgroundColor = .green
        return cv
    }()

    let sectionInsets = UIEdgeInsets(top: 10, left: 10, bottom: 10, right: 10)

    override func viewDidLoad() {
        super.viewDidLoad()

        view.addSubview(collectionView)
        collectionView.delegate = self // ✅ Rx를 사용하더라도 Delegate는 꼭 잡아주기
        collectionView.register(MyCollectionViewCell3.self, forCellWithReuseIdentifier: MyCollectionViewCell3.identifier)

        autoLayout()
		let data = Observable<[String]>.of(self.array)

        data.asObservable()
            .bind(to: collectionView.rx
                    .items(
                        cellIdentifier: MyCollectionViewCell3.identifier,
                        cellType: MyCollectionViewCell3.self)
            ) { index, recommend, cell in
                cell.img.image = UIImage(named: "testImage")
                cell.label.text = "index \(index)"
            }

    }
}

extension ViewController10 : UICollectionViewDelegateFlowLayout {

    func collectionView(_ collectionView: UICollectionView, layout collectionViewLayout: UICollectionViewLayout, sizeForItemAt indexPath: IndexPath) -> CGSize {
        let width = collectionView.bounds.width
        let height = collectionView.bounds.height

        let itemsPerRow: CGFloat = 3 // 최초 화면에 보여져야하는 row rottn
        let widthPadding = sectionInsets.left * (itemsPerRow + 1)
        var itemsPerColumn: CGFloat = 4 // 최초 화면에 보여져야하는 columns 갯수
        itemsPerColumn = ceil(itemsPerColumn)
        print(itemsPerColumn)
        let heightPadding = sectionInsets.top * (itemsPerColumn + 1)

        let cellWidth = (width - widthPadding) / itemsPerRow
        let cellHeight = (height - heightPadding) / itemsPerColumn


        return CGSize(width: cellWidth, height: cellHeight)
    }

    // case A
    func collectionView(_ collectionView: UICollectionView, layout collectionViewLayout: UICollectionViewLayout, insetForSectionAt section: Int) -> UIEdgeInsets {
        return sectionInsets
    }

    // case B
    func collectionView(_ collectionView: UICollectionView, layout collectionViewLayout: UICollectionViewLayout, minimumLineSpacingForSectionAt section: Int) -> CGFloat {
        return sectionInsets.left
    }
}

extension ViewController10 {

    private func autoLayout() {
        collectionView.snp.makeConstraints {
            $0.edges.equalTo(view.safeAreaLayoutGuide)
                .inset(UIEdgeInsets(top: 0, left: 0, bottom: 200, right: 0))
        }
    }
}
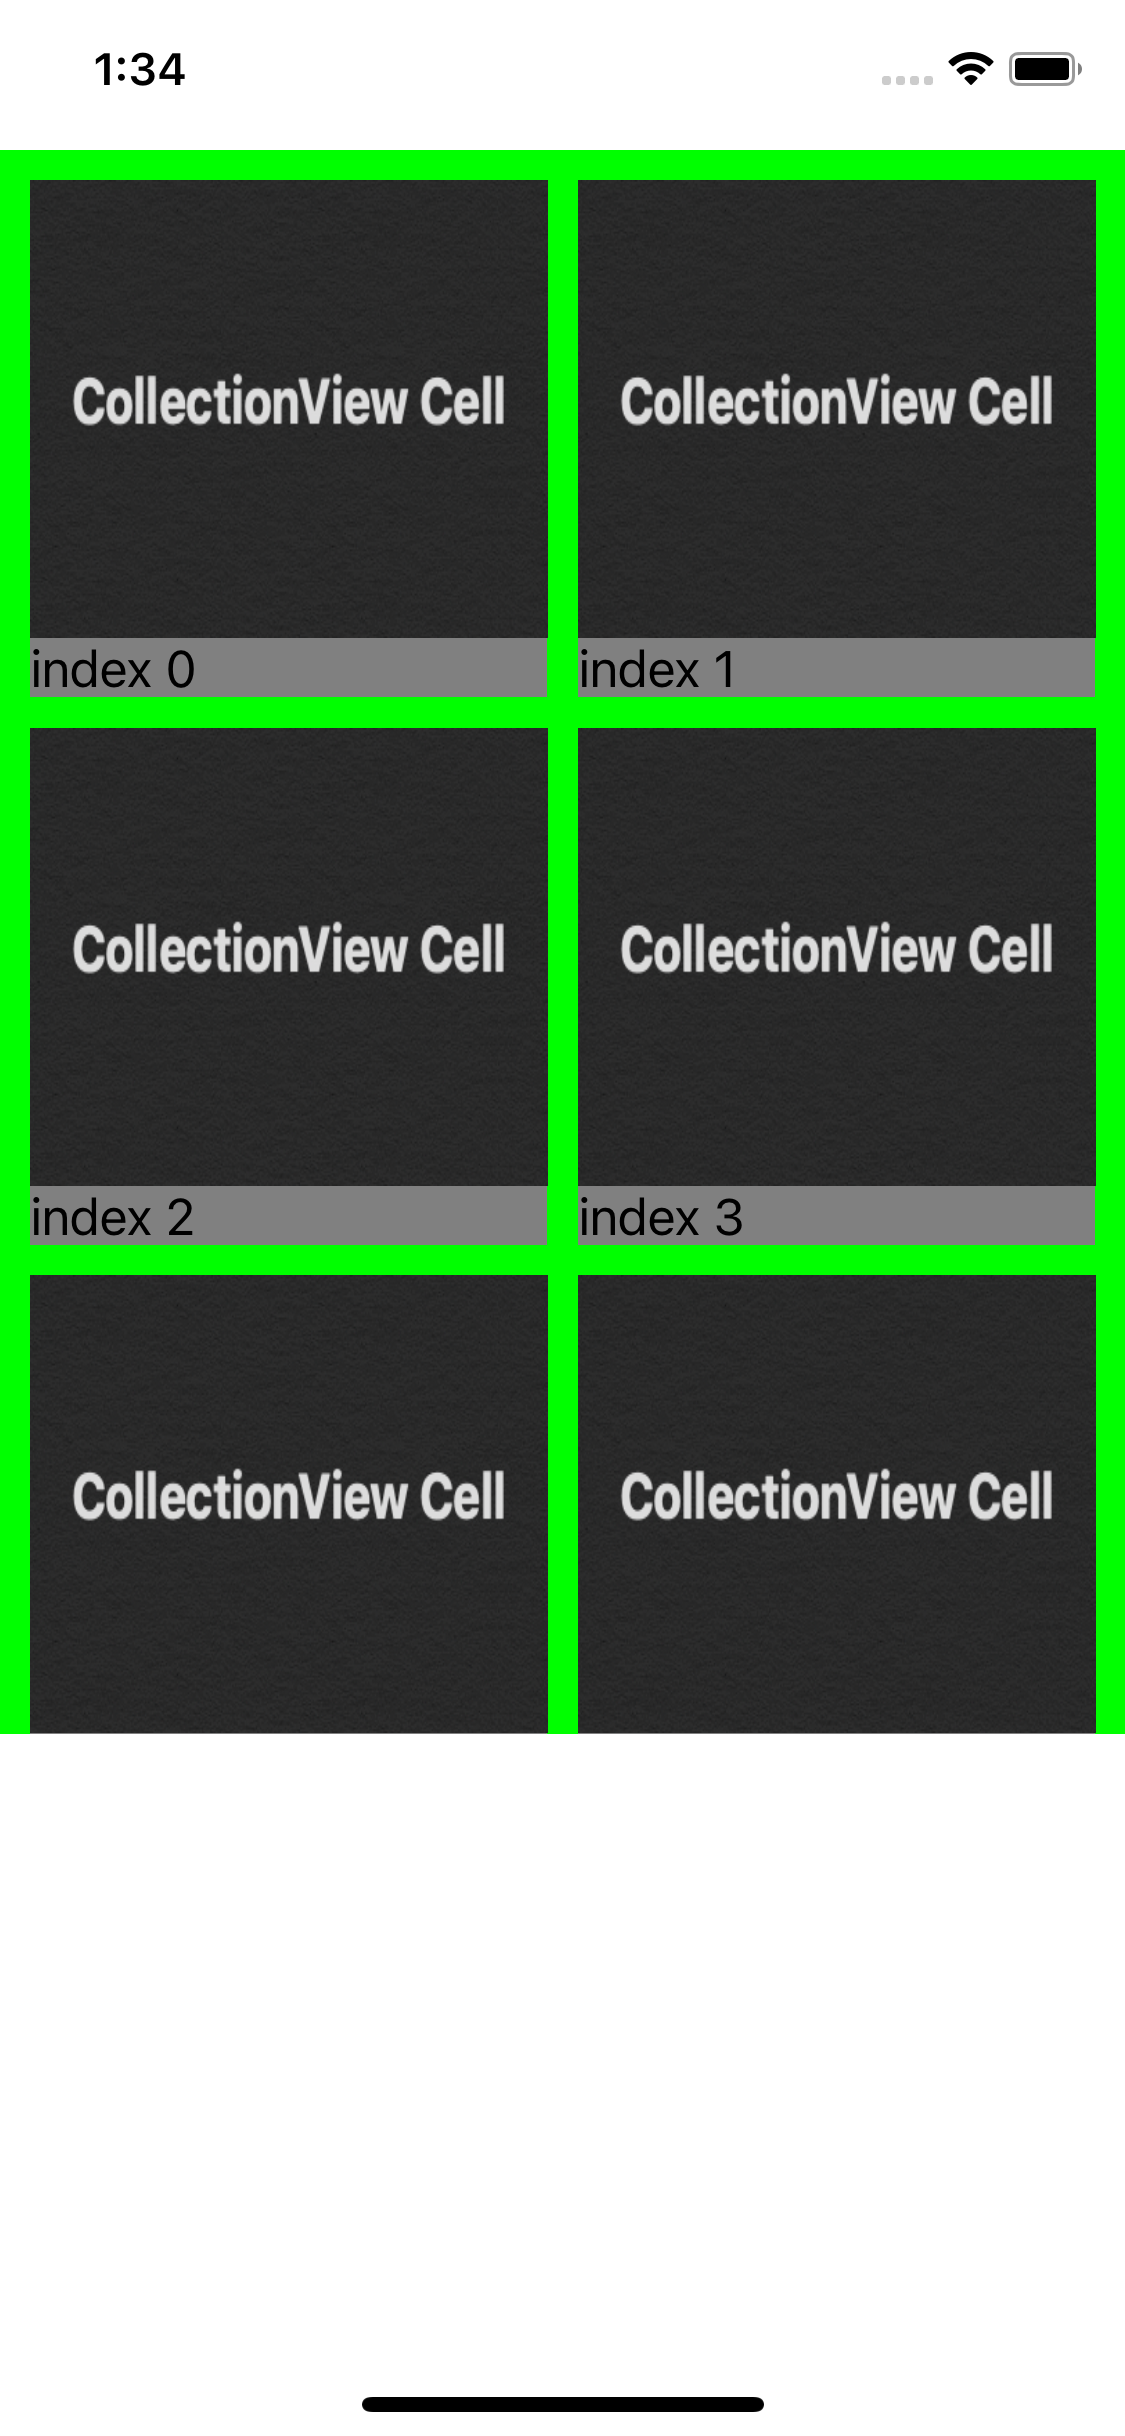
인셋에 따른 변화 관찰하기
위에 코드를 보면 case A와 case B를 적어뒀는데 아래 코드를 보면서 각 부분이 주석처리 되었을 때 달라지는 변화를 관찰해보자.
- 왼쪽 : case A만 주석처리
- 가운데 : case A,B 모두 주석처리
- 오른쪽 : case B만 주석처리


코드의 결과를 보면
case B는 상하의 간격을 조절하는 코드
case A는 inset으로 뷰의 가장자리에서 거리를 조절하는 코드
위 형태를 적용할 때 주의할 점.
위의 코드에서는 itemsPerRow 와 itemsPerColumn를 하드 코딩해서 적용.
이런 경우에 초록색 영역에 보여져야하는 Row와 Coloumn의 갯수를 정해버림.
즉, 기기 크기에 따른 동적 대응이 어려움. (웹의 Flex 생각!)


스토리보드로 하면 뭔가 눈에 보여서 편한데, 눈에 보이지 않는 부분에서 코드로 레이아웃을 사용한다면 조금 더 신경써야 할 부분이 아닌가 싶다.
조금 더 일반적으로 사용하기
하드코딩해서 사용하는게 아니라 조금 더 일반적으로 사용해보자
//
//  UICollectionView.swift
//  SnapKitPractice
//
//  Created by LeeGeonWoo on 2021/08/22.
//

import Then
import UIKit
import RxSwift
import RxCocoa
import RxDataSources

// Cell
class MyCollectionViewCell3 : UICollectionViewCell {
    static let identifier = "cell3"

    var img = UIImageView().then {
        $0.translatesAutoresizingMaskIntoConstraints = false
        $0.image = UIImage(named: "testImage")
    }

    var label = UILabel().then {
        $0.translatesAutoresizingMaskIntoConstraints = false
        $0.text = "상어상어"
    }

    override init(frame: CGRect) {
        super.init(frame: frame)
        self.cellSetting()
    }

    required init?(coder: NSCoder) {
        fatalError("init(coder:) has not been implemented")
    }

    func cellSetting() {
        self.backgroundColor = .gray
        self.addSubview(img)
        self.addSubview(label)

        img.contentMode = .scaleToFill
        img.snp.makeConstraints {
            $0.leading.top.trailing.equalTo(0)
            $0.bottom.equalTo(-20)
        }
        label.snp.makeConstraints {
            $0.leading.bottom.trailing.equalTo(0)
            $0.top.equalTo(img.snp.bottom)
        }
    }
}

class ViewController10 : UIViewController {

    var array = ["first","second","third","fourth","fifth","6","7","8","9","10","11","12"]

    var collectionView : UICollectionView = {
        var layout = UICollectionViewFlowLayout()
        layout.minimumLineSpacing = 0
        layout.scrollDirection = .vertical
        layout.sectionInset = .zero

        let cv = UICollectionView(frame: .zero, collectionViewLayout: layout)
        cv.backgroundColor = .green
        return cv
    }()

    let sectionInsets = UIEdgeInsets(top: 10, left: 10, bottom: 10, right: 10)

    override func viewDidLoad() {
        super.viewDidLoad()

        view.addSubview(collectionView)
        collectionView.delegate = self // rx쓰더라도 이거 꼭 연결해야해
        collectionView.register(MyCollectionViewCell3.self, forCellWithReuseIdentifier: MyCollectionViewCell3.identifier)

        autoLayout()

        let data = Observable<[String]>.of(self.array)
        data.asObservable()
            .bind(to: collectionView.rx
                    .items(
                        cellIdentifier: MyCollectionViewCell3.identifier,
                        cellType: MyCollectionViewCell3.self)
            ) { index, recommend, cell in
                cell.img.image = UIImage(named: "testImage")
                cell.label.text = "index \(index)"
            }

    }
}

extension ViewController10 : UICollectionViewDelegateFlowLayout {

    func collectionView(_ collectionView: UICollectionView, layout collectionViewLayout: UICollectionViewLayout, sizeForItemAt indexPath: IndexPath) -> CGSize {
        let itemSpacing : CGFloat = 10
        //let textAreaHeight : CGFloat = 65

        // ✅ 전체 width에 따라서 동적으로 !
        let width : CGFloat = (collectionView.bounds.width - 20 - itemSpacing * 2) / 3
        //let height : CGFloat = width * 10/7 + textAreaHeight

        return CGSize(width: width, height: width)
    }

    // case A
    func collectionView(_ collectionView: UICollectionView, layout collectionViewLayout: UICollectionViewLayout, insetForSectionAt section: Int) -> UIEdgeInsets {
        return sectionInsets
    }

    // case B
    func collectionView(_ collectionView: UICollectionView, layout collectionViewLayout: UICollectionViewLayout, minimumLineSpacingForSectionAt section: Int) -> CGFloat {
        return sectionInsets.left
    }
}

extension ViewController10 {

    private func autoLayout() {
        collectionView.snp.makeConstraints {
            $0.edges.equalTo(view.safeAreaLayoutGuide)
                .inset(UIEdgeInsets(top: 0, left: 0, bottom: 200, right: 0))
        }
    }
}
레이아웃에 크기를 지정할 때 그 수만큼 inset의 수도 계산해서 빼주면 안정적으로 UI를 구성할 수 있음.


'apple > iOS, UIKit, Documentation' 카테고리의 다른 글
| iOS Starscream 총정리 (0) | 2022.01.12 |
|---|---|
| iOS Snapkit 나만의 정리 모음 (5) | 2021.08.25 |
| iOS SnapKit 공식문서로 공부하기 9탄 (UICollectionView 코드로 구성하기 2편) (0) | 2021.08.22 |
| iOS SnapKit 공식문서로 공부하기 8탄 (UICollectionView 코드로 구성하기 1편) (0) | 2021.08.22 |
| iOS SnapKit 공식문서로 공부하기 7탄 (UITableView 코드로 구성하기 3편) (0) | 2021.08.19 |