Swift 디자인패턴 Adapter Pattern (어댑터 패턴)
Swift 디자인패턴 Adapter Pattern (어댑터 패턴)
Adapter Pattern은 서로 호환되지 않는 인터페이스를 가진 클래스들이 함께 동작할 수 있도록 중간 역할을 하는 구조 패턴.
기존 코드를 변경하지 않고, 원하는 인터페이스를 갖춘 어댑터를 추가하여 두 시스템을 연결
히스토리
- 2022-05-13: 디자인 패턴 스터디 정리
- 2024-11-28: 포스팅 글 재정리 및 예제 변경
Adapter Pattern
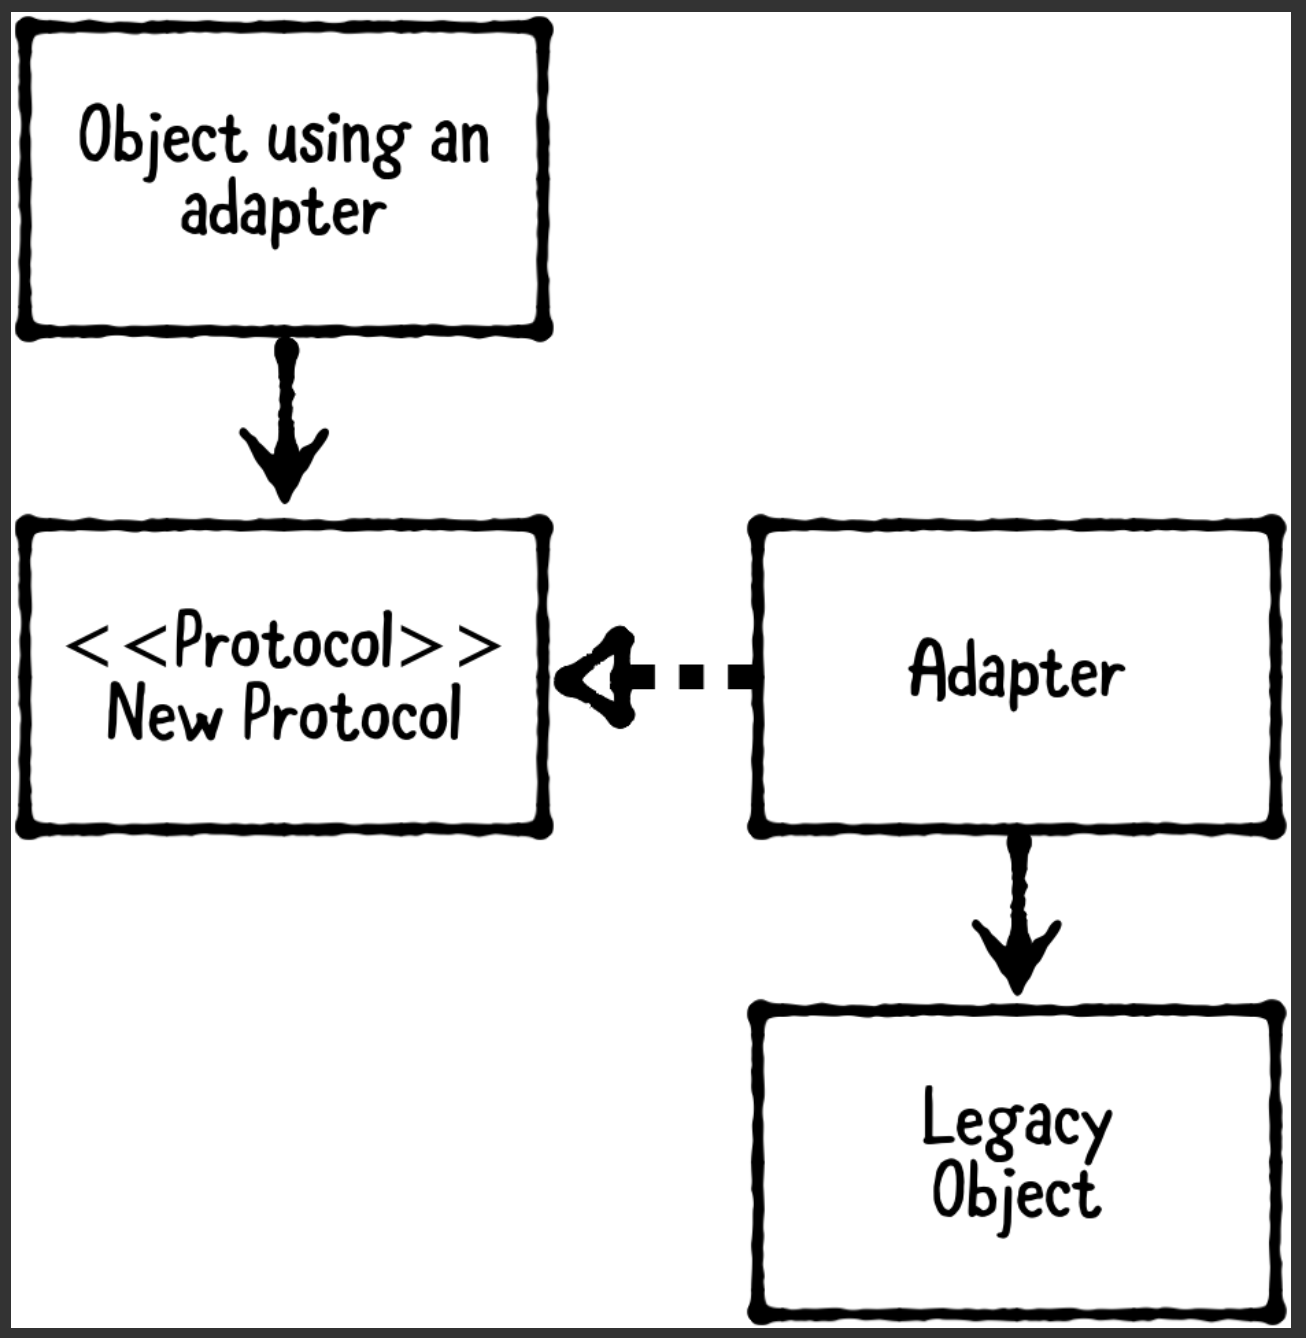
어댑터 패턴은 4가지 구성요소로 이루어져 있음
- 클라이언트(Client):특정 인터페이스를 기대하며 동작하는 코드.
- 타겟(Target): 클라이언트가 호출하려는 인터페이스.
- 어댑터(Adapter): 타깃 인터페이스를 구현하여, 실제 서비스를 제공하는 어댑티(Adaptee)를 감싸는 객체.
- 어댑티(Adaptee): 기존에 존재하지만, 클라이언트가 기대하는 인터페이스와 다른 인터페이스를 가진 클래스.
적용하면 좋은 경우
- 기존 코드 재사용: 기존 클래스나 라이브러리를 수정하지 않고, 새로운 인터페이스를 통해 재사용할 때
- 호환성 문제 해결: 서로 다른 시스템이나 API 연결하고자 할 때
- 점진적 마이그레이션: 기존 시스템을 새로운 구조로 이전하는 중에 임시적으로 연결할 때
장점
- 기존 객체 수정 없이 재사용 가능
- 클라이언트와 어댑티를 느슨하게 결합 가능
- 기존 코드와 호환성 유지
단점
- 어댑터를 너무 많이 사용하면 코드 복잡도 증가
- 어댑터를 사용하면 성능 오버헤드 발생 가능
코드 예제
어댑터 패턴은 실제로 활용 범위가 정말 넓어서 별도의 예제가 아니라 직관적으로 작성
import SwiftUI

class Adaptee {
    func printText(_ text: String) {
        print("Legacy Printer: \(text)")
    }
}

protocol Target {
    func printData(data: String)
}

class Adapter: Target {
    private let adaptee: Adaptee

    init(adaptee: Adaptee) {
        self.adaptee = adaptee
    }

    func printData(data: String) {
        adaptee.printText(data)
    }
}

private struct ContentView: View {
    var body: some View {
        Button("Execute") {
            let adaptee = Adaptee()
            let adapter = Adapter(adaptee: adaptee)

            adapter.printData(data: "Hello, Adapter Pattern!")
        }
    }
}

#Preview {
    ContentView()
}

(참고)
https://www.raywenderlich.com/books/design-patterns-by-tutorials/v3.0/chapters/12-adapter-pattern
Design Patterns by Tutorials, Chapter 12: Adapter Pattern
Classes, modules, and functions can’t always be modified, especially if they’re from a third-party library. Sometimes you have to adapt instead! You can create an adapter either by extending an existing class, or creating a new adapter class. This chap
www.kodeco.com:443
https://refactoring.guru/ko/design-patterns/adapter
어댑터 패턴
/ 디자인 패턴들 / 구조 패턴 어댑터 패턴 다음 이름으로도 불립니다: 래퍼(Wrapper), Adapter 의도 어댑터는 호환되지 않는 인터페이스를 가진 객체들이 협업할 수 있도록 하는 구조적 디자인 패턴
refactoring.guru